Guide · 6 min read
Cut list template: columns, samples, and PDF export
Searching for a cut list template usually means you want a repeatable way to list parts before cutting. Cutlistor does not ship blank fillable PDF forms. Instead you import structured rows from CSV or XLSX (sample files included) or build the list directly in the optimizer, then export annotated PDF cut layouts for the shop floor. The goal is one source of truth: part names, finished sizes, quantities, and material codes that flow into kerf-aware nesting without retyping. When a dimension changes, you update the spreadsheet or table once and regenerate the layout PDF.
What columns belong on a cut list
A practical cut list template is really a column contract between design and the optimizer. Every row is one part type (or one line item) with a quantity, not one row per physical piece unless your shop prefers that style.
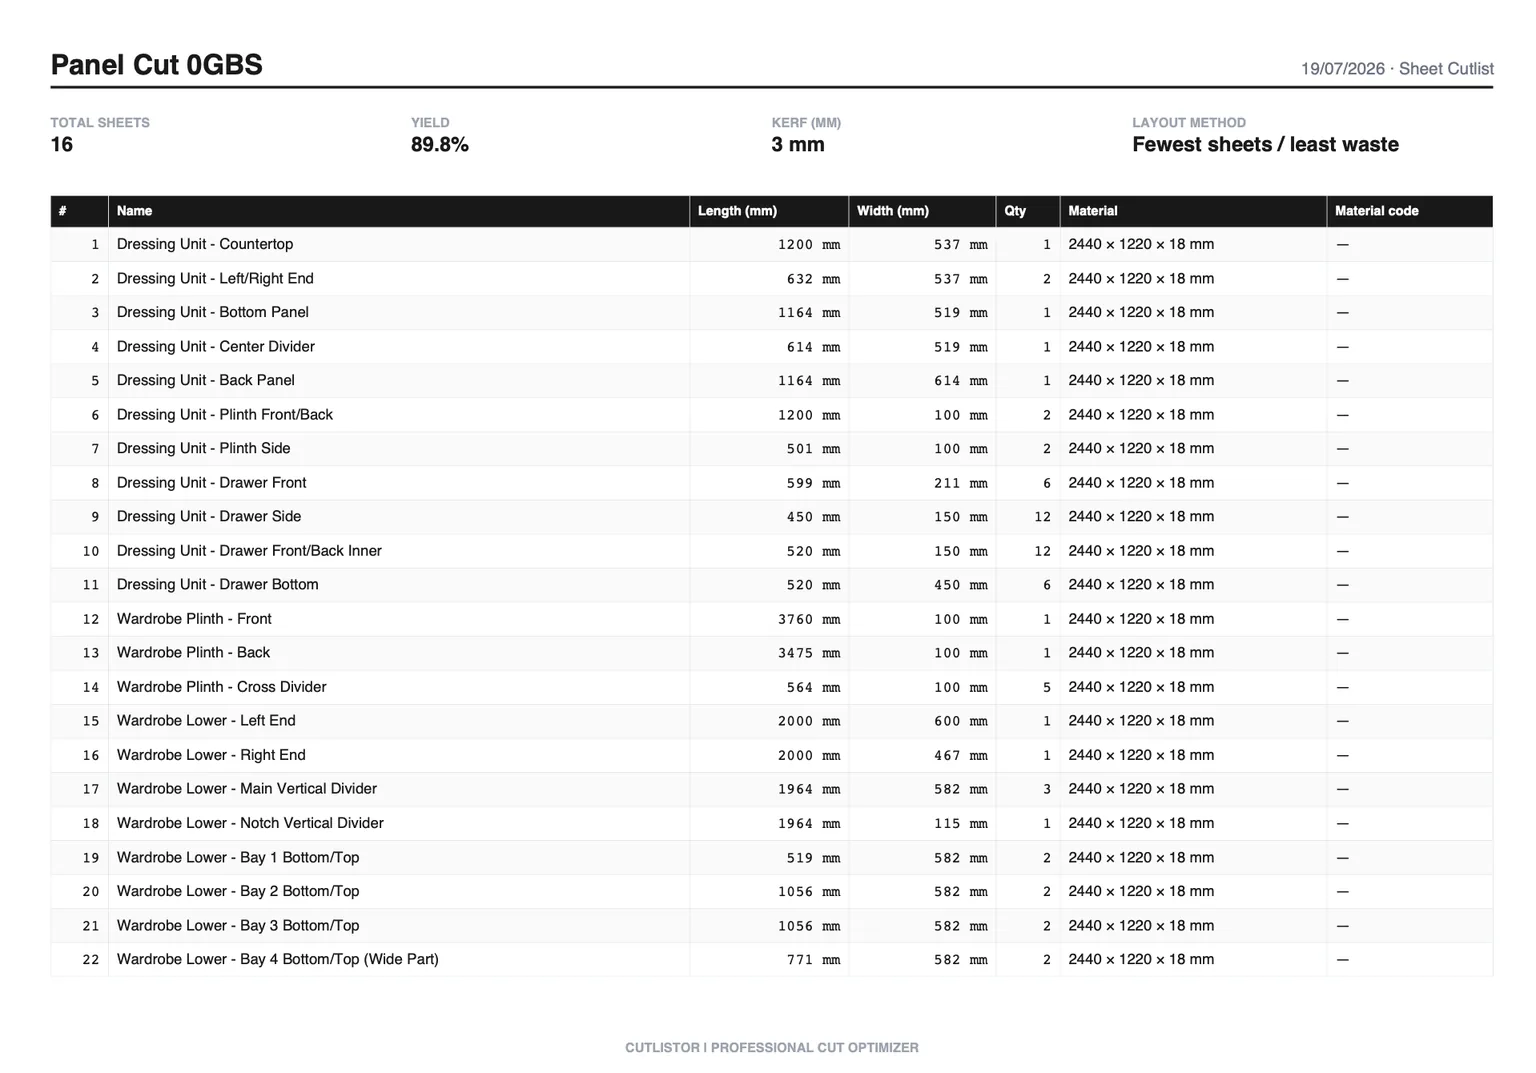
For sheet goods you need a name, length, width, and quantity at minimum. Length and width map to the two panel dimensions you cut on the table saw or CNC. For linear stock you need name, length, and quantity because width is not part of the waste equation.
Material columns tie each part to the stock you purchase. Use a short material code your crew recognizes (for example PLY-1829-610) plus a longer material name for clarity on PDF exports.
| Column | Sheet import | Linear import | Purpose |
|---|---|---|---|
| name | Required | Required | Label on diagrams and pull lists |
| length | Required (panel dimension) | Required (cut length) | Finished size along the primary axis |
| width | Required | Not used | Second panel dimension for 2D nesting |
| qty | Required | Required | How many identical pieces to cut |
| material code | Optional | Optional | Groups parts onto the same stock SKU |
| material name | Optional | Optional | Readable name on exports |
| custom column | Optional | Optional | Job, room, phase, or CNC layer notes |
Column headers match the downloadable sample files linked below.
Sheet vs linear spreadsheet layout
Do not mix sheet and linear parts on one import file. Run panel rectangles through the sheet cut list optimizer and length-only parts through the linear cut list optimizer. Cabinet jobs often need both: melamine sides on sheets and 2×4 cleats on sticks.
Keep units consistent within a file. Cutlistor accepts metric and imperial; pick one system per job so kerf and stock sizes stay comparable.
If you use material codes, every part that should nest on the same plywood SKU should share that code. Mixed codes tell the optimizer to treat stock separately, which is correct when you buy different thicknesses or finishes.
Sample import files and where to get them
Cutlistor publishes paired CSV and XLSX samples for sheet and linear workflows at /samples/cutlist-import/. Download sheet-cutlist-sample.csv or sheet-cutlist-sample.xlsx for panel jobs, and linear-cutlist-sample.csv or linear-cutlist-sample.xlsx for bar and stick stock.
The samples use realistic cabinet and framing part names so you can see how material codes group rows. Copy the header row into your own workbook, replace the example lines with your job, and import without guessing column order.
Google Sheets and Excel both export to CSV. If you use XLSX, keep a single header row and avoid merged cells in the data area so the importer reads every column cleanly.
Worked example: small wall cabinet import
Imagine one 610 mm wide base cabinet on 18 mm birch plywood, stock sheet 2440×1220 mm. Your cut list might include: two sides at 1829×610 mm qty 2, three shelves at 448×610 mm qty 3, one drawer front at 356×140 mm qty 1, all tagged material code PLY-1829-610.
In Cutlistor, open the free sheet cut list optimizer, import the CSV, set stock to 2440×1220 mm, set kerf to match your blade (often 3.2 mm for a thin-kerf rip blade), and run the layout. The optimizer reports how many sheets you need and shows nested rectangles.
If the shelf depth changes from 448 mm to 464 mm, edit one spreadsheet cell, re-import, and recalculate. The PDF cut plan updates with new positions. That is the advantage over a static paper template that cannot redraw itself.
From spreadsheet to PDF cut plan
After import, confirm stock sizes match what you will load on the truck, not a generic 4×8 label if you actually buy 2440×1220 mm metric panels. Set kerf before trusting yield percentages.
Choose a sheet layout method that matches your saw workflow: Rips & rows for fast site ripping, Fewest sheets / least waste when material cost dominates, Neat grid when you want uniform row heights, Router / CNC layout when you need denser nesting with spoilboard spacing.
Export the PDF when the layout looks right. The export includes labeled parts and sheet diagrams your crew can follow at the saw. Free tier sessions support 3 calculations per day, up to 20 part rows, and CSV imports of up to 5 rows; a paid trial unlocks saved projects and inventory.
Common template mistakes to avoid
Swapping length and width on sheet parts rotates nesting on the diagram. Pick a shop convention (grain along length, for example) and stick to it for every row.
Forgetting quantity multiplies waste math. One line with qty 6 is better than six duplicate lines unless you need unique labels per piece.
Using rough lumber dimensions instead of finished panel sizes produces layouts that do not fit after edge banding or squaring. List the size after your final machining step.
FAQ
- Can I download a blank cut list PDF template?
- Cutlistor focuses on optimizer-generated PDF cut plans with diagrams, not empty forms. Use the CSV/XLSX samples for input structure, then export the layout PDF after optimizing.
- Should I use CSV or XLSX?
- Both work. CSV is simplest for scripts and Google Sheets export. XLSX is fine if you already maintain a formatted workbook. Keep the same column headers as the samples.
- What is the custom column for?
- It is a free-text field for anything your shop tracks: room name, assembly phase, CNC layer, or customer PO. It flows through import and can appear on documentation.
- How many rows can I import on the free optimizer?
- The free sheet and linear tools accept up to 20 part rows per session. Larger jobs can split by material or start a paid trial for saved projects and higher limits.
- Does import set grain direction automatically?
- Import brings sizes and labels. Set grain direction per part in the sheet optimizer UI when faces need to match veneer or melamine orientation.
Related guides
- What is a cut list?Cut list definition: what a cutting list contains, how it differs from a BOM, and when shops use cut lists in construction, cabinetry, and fabrication.
- What is material grouping?Material grouping splits a cut list by thickness, finish, and stock SKU so each batch nests on the right sheet or stick — without mixing melamine and plywood.
- Cutting plan efficiency explainedWhat cutting plan efficiency means, how yield is measured on sheet and linear jobs, and how linear cutting optimisation software improves results.
- Length nesting for linear stockLength nesting for lumber, pipe, and bar stock: how 1D nesting works, kerf, stock lengths, and Cutlistor’s free linear cut list optimizer.