Article
How to Build a Cabinet From a Cut List
Cutlistor Team4 min read
Introduction
Building from a cut list means the sizes are already decided. Your job is to cut accurately, keep labels intact, machine joinery, assemble square boxes, and hang doors and drawers that match the overlay and slide specs on the list.
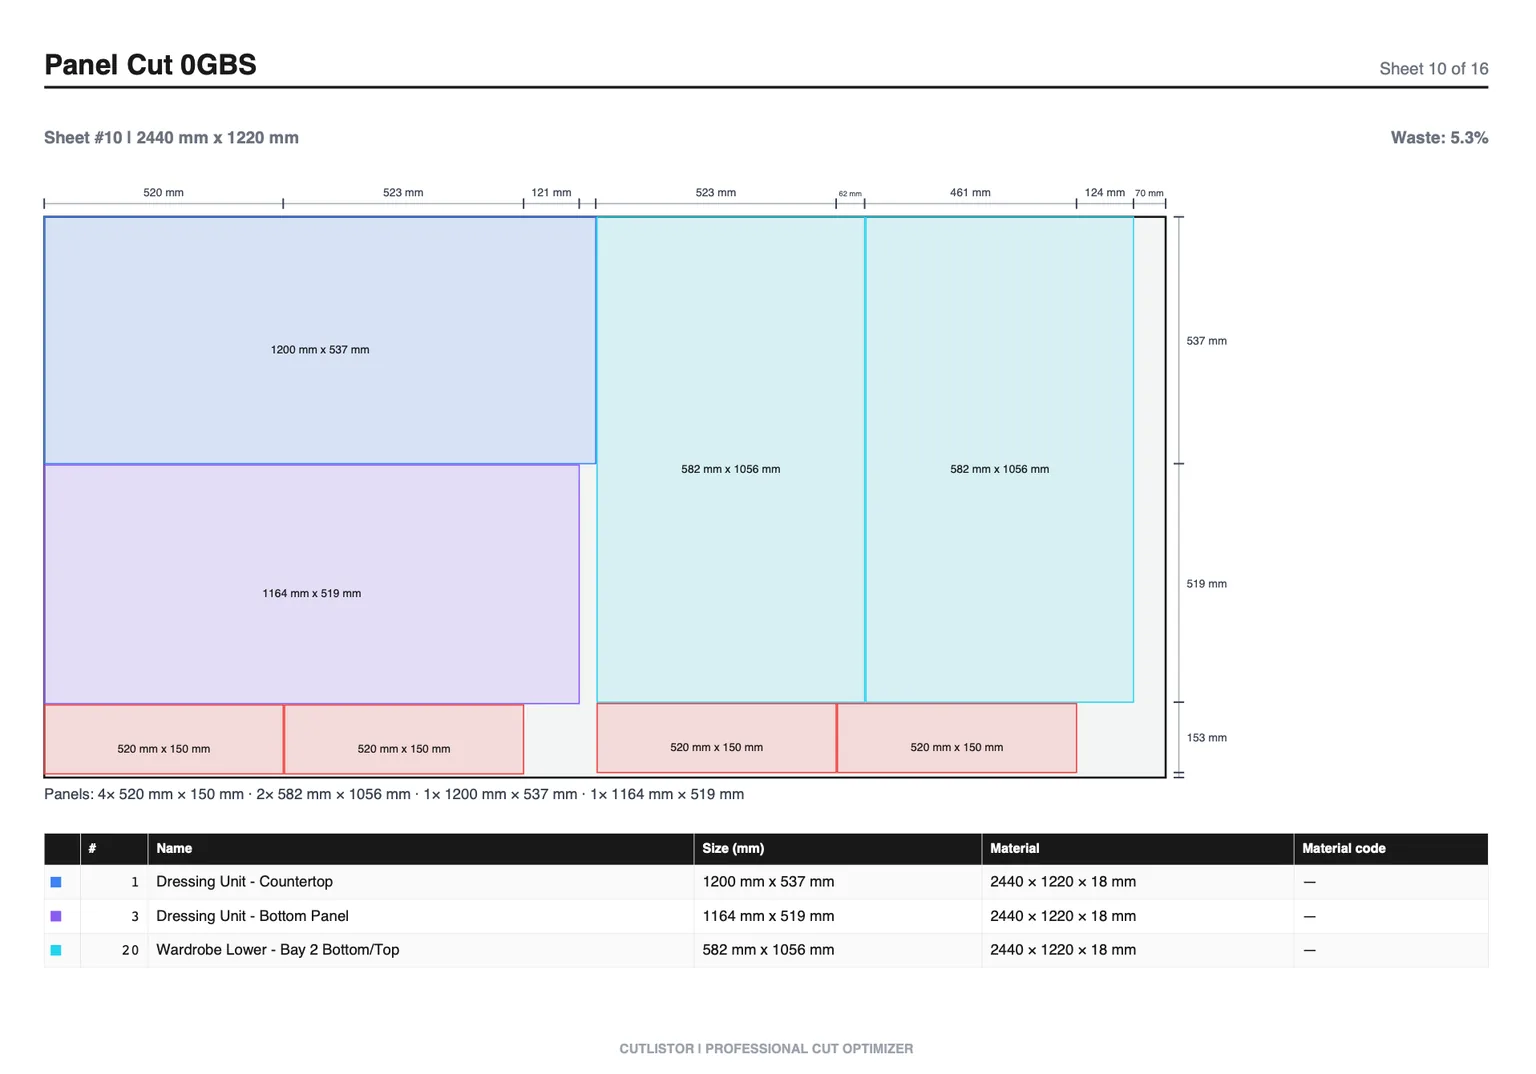
Shops that treat the cut list as optional rework parts on the assembly table. Shops that treat it as the source of truth move from nest PDF to finished box with fewer surprises. This guide assumes you already have a verified list and nest.
Step 1: Verify the Cut List Against Hardware
Before cutting, confirm drawer box widths match the slide data sheet, door sizes match overlay style, and hinge boring patterns match your hinge brand. A correct nest of wrong door sizes still fails at hang time.
- Case parts sum to the intended box width and height
- Grain locks make sense for show faces
- Back thickness and joinery noted
- Edge-band edges marked
- Cabinet IDs unique across the batch
Step 2: Cut and Label From the Nest
Cut sheet goods from the optimized layout PDF or CNC program. Label every part as it leaves the saw: cabinet ID, part name, and show face. Stage by cabinet or by operation, depending on shop flow. Do not wait until the pile grows cold to mark parts.
Linear face-frame stock and cleats come from the linear cut list, not the sheet nest.
Step 3: Edge Band and Machine
| Operation | Typical parts | Watch for |
|---|---|---|
| Edgebanding | Gables, decks, doors | Color match and corner cleanup |
| Dados / grooves | Bottoms, backs | Actual thickness of stock |
| Hinge boring | Doors | Overlay and cup depth |
| Slide boring | Drawer sides | Slide model and inset |
| CNC nesting cut | All sheet parts | Labels and vacuum hold-down |
Step 4: Assemble the Case
Dry-fit critical joints, then assemble gables, bottom, stretchers or top, and back. Check for square across diagonals before the glue or fasteners set. Install toe kick platform or legs per the plan. Face frames go on after the box is square if that is your method.
Step 5: Hang Doors and Fit Drawers
Hang doors to the overlay gaps defined in the cut list. Fit drawer boxes on slides, then attach fronts with consistent reveals. Adjust hinges and slides before final finish or packing.
Worked Flow: One 900 mm Base
- Nest 18 mm melamine case parts + door blanks; nest 12 mm drawer sides separately
- Cut and label: GABLE-L/R, BOTTOM, STRETCHER×2, SHELF, DOOR×2, drawer box set, BACK
- Edge band show edges on gables, doors, and drawer front
- Bore hinges on doors; bore slides on drawer sides
- Assemble box, square, install back
- Hang doors, install drawer, set reveals to 2-3 mm (or shop standard)
- QA against cut list sizes and hardware checklist
Where Cutlistor Fits
Cutlistor produces the nested sheet layouts and PDF plans you cut from. Pro ($12/mo) can export DXF for CNC when you need rectangles in CAM. It does not replace assembly fixtures or hinge boring machines.
Free use is genuinely unmetered where it matters for cutting: change a dimension, re-nest, change it again, at no cost. The 3-per-day allowance covers PDF exports and new projects. Cut lists stop at 20 rows, imported CSV or XLSX files at 5 rows, and there is no persistence between visits.
FAQ
Should I assemble all boxes before hanging any doors?
Many shops batch-assemble all boxes, then hang doors in a second pass for consistent reveals. Small custom shops sometimes finish one cabinet completely for client approval first.
What if a part is cut to the wrong size?
Stop and update the cut list and nest before cutting a replacement from a full sheet. Opportunistic scrap cuts without updating the BOM create silent shortages later in the run.
How does this change for multiple cabinets?
Keep the same sequence, but cut by material across cabinets and stage labeled piles per cabinet ID. See the batching guide.
Conclusion
Building from a cut list is disciplined execution: verify, cut and label, machine, assemble square, then hang and adjust. The list and nest remain the authority when something looks off on the bench.
If you still need a list, build it first, nest it in Cutlistor, then follow this sequence on the floor.