Article
How to Plan Kitchen Cabinet Installation
Cutlistor Team4 min read
Introduction
Cabinet installation is where drawings meet out-of-square walls. A clean sequence — walls ready, cabinets set and leveled, counters templated, appliances set, backsplash last — prevents the common rework loop of cutting tile before the counter edge exists.
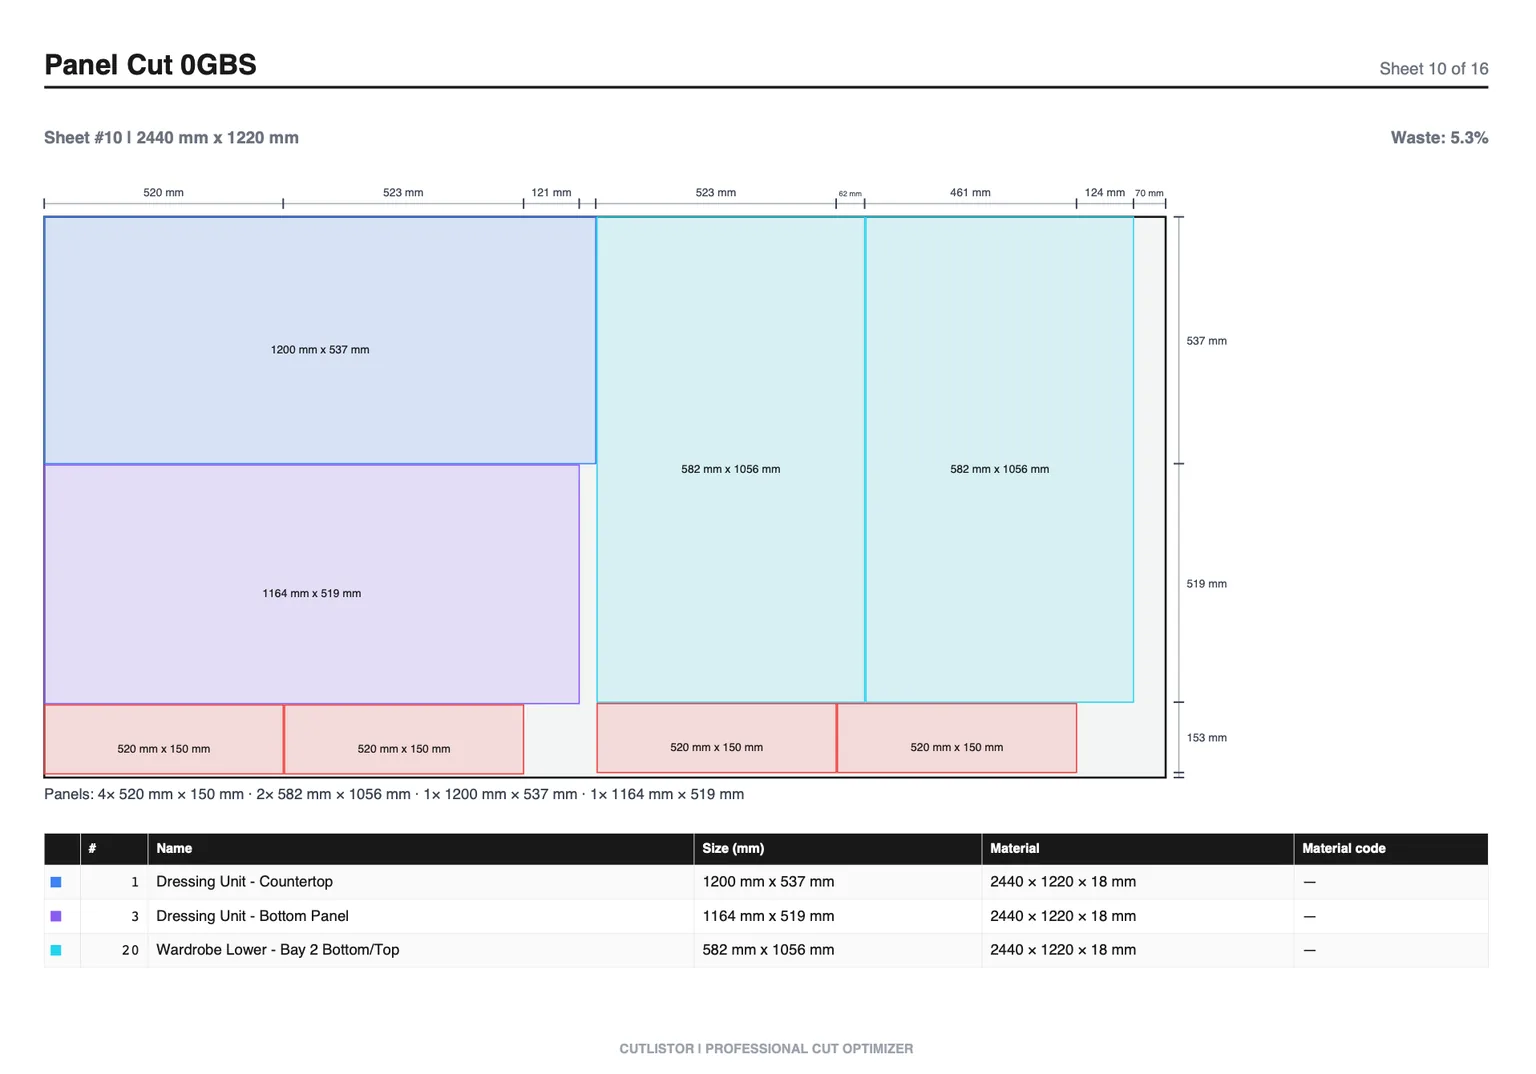
This guide covers install order, leveling, fillers and scribe, coordination with counter fabricators, and how custom shops should label parts from cut diagrams so the site crew matches the nest.
Recommended install sequence
| Stage | Work | Why it sits here |
|---|---|---|
| 1. Walls & utilities | Drywall, paint (or prime), electrical/gas/plumbing rough-ins complete | Cabinets should not wait on open walls |
| 2. Floors (often) | Finished floor or underlayment per plan | Toe-kick height and dishwasher reveal depend on floor |
| 3. Cabinets | Set, level, fasten, fillers/scribe | Creates the datum for counters |
| 4. Counters | Template then install | Needs final cabinet plane |
| 5. Appliances | Set range, DW, fridge, etc. | Often after counters for cooktops; freestanding varies |
| 6. Backsplash | Tile or slab splash | Meets finished counter edge |
| 7. Finish | Hardware, caulk, touch-up, final clean | After wet trades |
Some crews hang wall cabinets before finished floors to protect flooring; others set bases first. Agree in writing. Floating floors that tuck under toe kicks need a different dance than tile set after cabinets.
Site readiness checklist
Do not deliver finished cabinets into a wet or unfinished room.
- Walls plumb enough for plan; mark high/low spots
- Stud locations mapped for screws and ledger strips
- Utilities stubbed to appliance and sink locations
- Laser or water level establishes finished floor and ceiling references
- Appliance models confirmed so openings match boxes on site
- Protective floor covering staged before cabinet carts roll in
Leveling bases and hanging uppers
| Task | Field tip |
|---|---|
| Find high spot | Bases shim up to this; avoid sloping counters |
| Clamp runs | Clamp adjacent boxes before final screws |
| Face alignment | Flush faces across a run before tightening |
| Island | Confirm centerlines to walls and range before lagging |
| Tall units | Plumb first; they telegraph twists into the whole elevation |
Fillers, scribe, and out-of-square walls
Fillers absorb the difference between perfect drawings and real walls. Cut oversized blanks in the shop; trim on site. Scribe panels and finished ends to wavy drywall so caulk joints stay thin.
Budget filler width during layout — typically starting around 38–76 mm (1-1/2 to 3 in) per wall contact — then field-fit. Never stretch every box to soak up error; that breaks door reveals and appliance openings.
Coordination with counter templating
Stone, quartz, and solid-surface shops template after cabinets are set, leveled, and fastened. If bases still move, the template lies. Sink and cooktop cutouts need final appliance or sink models on site or clearly specified.
Tell the fabricator about overhang targets, edge profiles, and whether dishwasher end panels or appliance garages affect the counter shape. Laminate and butcher block may be measured differently — still wait for a true cabinet plane.
- Cabinets locked before template day
- Sink and faucet models confirmed
- Cooktop model confirmed for cutout
- Support for overhangs and seating agreed
- Splash height decision made before tile orders
Appliances and backsplash after cabinets
Freestanding ranges and fridges often set after cabinets; slide-ins and cooktops may wait for counters. Dishwashers need side clearances and a finished opening height that matches flooring. Do not tile the full splash until the counter edge is final — the tile line should meet the stone or laminate, not a temporary plywood top.
Custom shops: label parts from cut diagrams
| Label practice | Payoff |
|---|---|
| Cabinet ID on every box | Matches elevation drawings |
| Part ID from nest on panels | Fewer mix-ups in assembly |
| Hardware bag per cabinet | Hinges/slides do not float between jobs |
| Filler blanks tagged by wall | Field trim stays with the right elevation |
| PDF cut plan in job folder | Shop and site share one revision |
Common installation mistakes
- Setting cabinets before walls and utilities are ready
- Ignoring floor high spots — counters end up tilted
- Trimming fillers before confirming appliance openings
- Templating counters on unsecured bases
- Installing backsplash before final counter edges
- Unlabeled custom parts arriving in a mixed pile
FAQ
Should floors go before or after cabinets?
Follow the flooring type and GC plan. Many tile and vinyl jobs finish floors first; some hardwood crews prefer cabinets first with scribe moldings. Dishwasher and appliance reveals must match the chosen approach.
Can a homeowner install cabinets themselves?
Experienced DIYers can set boxes with good leveling tools, but counter templating, gas, and electrical still need qualified trades. Mistakes in fastening or plumbing access are expensive to reverse.
How does Cutlistor help installation?
Cutlistor does not replace installers. It helps custom shops nest sheet goods and export labeled cut plans so assembled cabinets arrive with IDs that match the elevation — fewer site puzzles when fillers and tall panels look alike.
Conclusion
Plan kitchen cabinet installation as a sequence: prepare walls and utilities, set and level cabinets with fillers and scribe, template counters on a locked cabinet plane, then set appliances and backsplash. Label custom parts from cut diagrams so site work matches the shop nest.
If you build the boxes yourself, nest and label sheet parts in Cutlistor before production so install day is assembly and leveling — not detective work.