Article
How to Import a CSV Cut List (Columns & Tips)
Cutlistor Team3 min read
Introduction
CSV is the universal export format from spreadsheets, ERP tools, and many cabinet programs. A clean CSV lets you load a cut list into Cutlistor without retyping—then nest with kerf, grain, and real-time re-optimize in the browser.
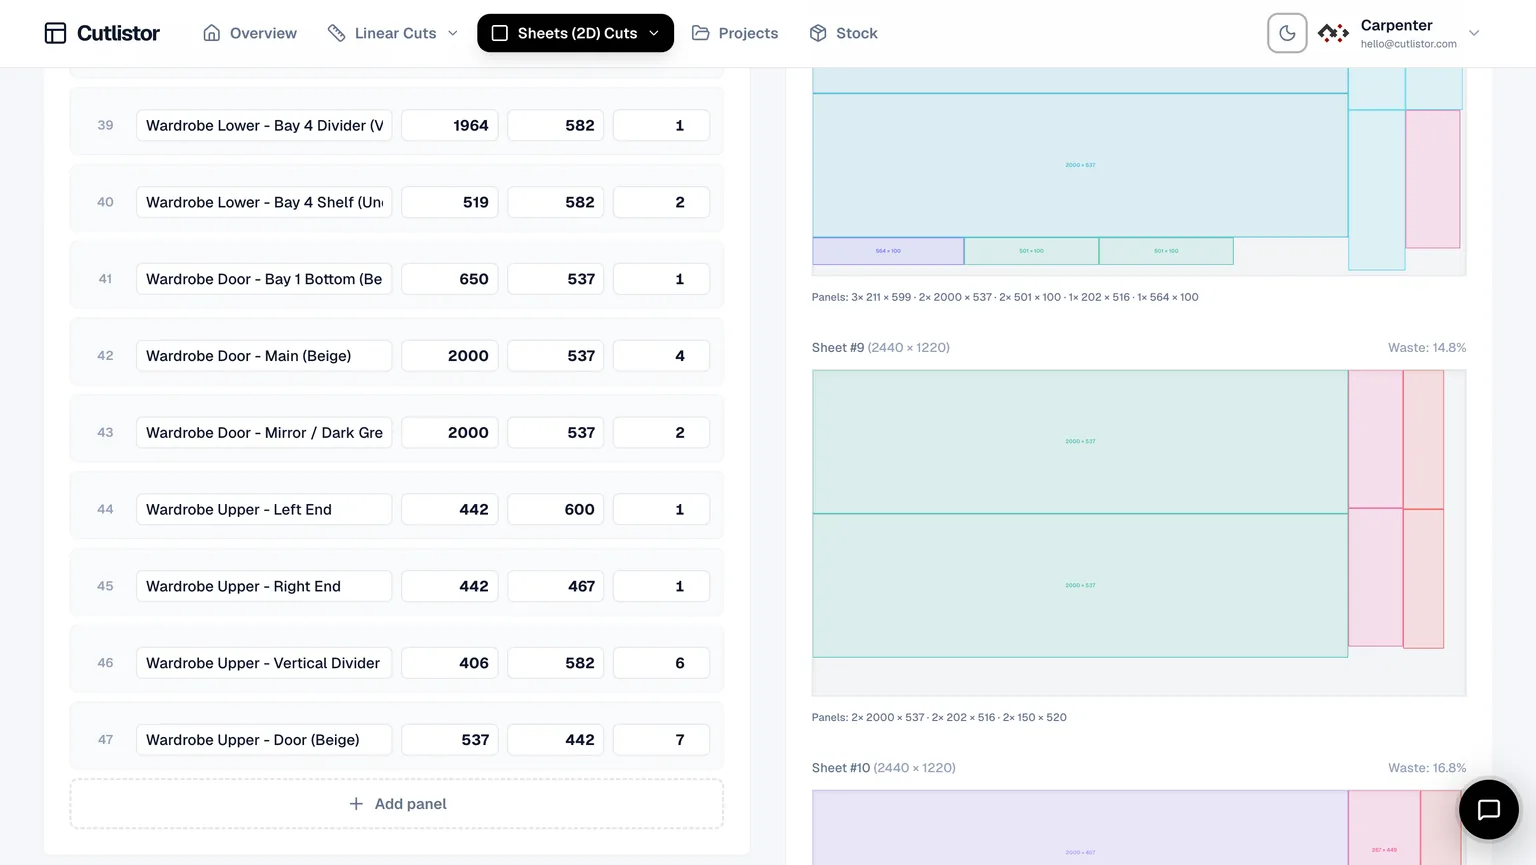
This article focuses on columns, delimiters, and shop tips. For native Excel workbooks, see the XLSX import guide; both formats are supported.
Recommended CSV columns
| Header | Sheet parts | Linear parts | Example |
|---|---|---|---|
| name | Yes | Yes | Shelf-2 |
| length | Yes | Yes | 720 |
| width | Yes | No / ignore | 300 |
| qty | Yes | Yes | 4 |
| material | Yes | Yes | 18mm-birch |
| grain | Optional | Rare | lock |
| project | Optional | Optional | JOB-A |
| notes | Optional | Optional | edge-band-long |
Formatting rules that prevent bad nests
Example header + rows:
name,length,width,qty,material,grain
A-Side,720,610,2,18mm-birch,lock
A-Shelf,688,300,4,18mm-birch,free
Step-by-step: import CSV in Cutlistor
Follow this sequence for a first successful import.
- Export or Save As CSV from Excel, Google Sheets, or your CAD BOM
- Open Cutlistor sheet or linear optimizer in the browser
- Choose import and select the CSV file
- Map columns to name, length, width, quantity, material
- Scan the preview for swapped axes or zero quantities
- Add stock sizes and kerf; review the live layout
- Export PDF cut plan (DXF on paid plans)
No account is needed to try it, and the free tier does not count the optimizing itself — parts can be edited and re-nested indefinitely. It counts finished PDFs and new projects, at 3 a day. Lists are limited to 20 rows, CSV and XLSX uploads to 5 rows per file, and work does not survive the session.
Sheet CSV vs linear CSV
Do not force lumber lengths into a sheet nest. Export two CSVs when the job mixes panels and sticks: one with length/width for plywood, one with length/qty for boards and trim.
Tips when CSV comes from other apps
Cabinet software and ERP exports often include hardware and labor rows. Filter to cut parts only. Rename cryptic column headers before import. If the export is XLSX-only, either save as CSV or import XLSX directly.
Batching multiple projects in one CSV
Add a project column and prefix names (A-Shelf, B-Shelf). Import once per material SKU, nest, cut, then sort by prefix. See batching and multi-project optimization guides.
After import: kerf, grain, prep
CSV gets parts into the tool; shop practice finishes the job. Set kerf from a test cut, lock grain on show faces, acclimate and label stock, then cut from the PDF.
Validate the CSV Before You Trust the Nest
Open the CSV in a plain text editor once. Look for doubled headers, semicolon vs comma delimiters, and quoted fields that contain commas inside part names. Those break mapping even when the file “opens fine” in Excel.
Spot-check five random rows against the drawing: length, width, quantity, material. If those five are wrong, the nest will be confidently wrong at full scale.
After import, sort by material and confirm you did not pull hardware or finish lines into the cut list. Then set kerf and grain before you celebrate the sheet count.
- Delimiter and encoding checked once per export path
- Five-row spot check against drawings
- Hardware rows filtered out
- Kerf set to the blade you will run that day
Next steps
If you are choosing tools, read the free and paid optimizer roundups. Small shops and furniture makers have dedicated software guides.