
Article
How to Use a Cabinet Cut List Optimizer (Step-by-Step for Casework)
Cutlistor Team3 min read
Introduction
A cabinet cut list optimizer earns its keep when gables, shelves, backs, and sticks become labeled sheet layouts your floor can cut without reopening the design file. This walkthrough is cabinet-specific: materials, grain, face frames, and kitchen-scale BOMs.
For the general (non-cabinet) walkthrough, see how to use a cut list optimizer. Here we stay on casework workflows inside Cutlistor and similar tools.
Step 1: Build a Clean Cabinet BOM
| Column | Example | Notes |
|---|---|---|
| Label | B12-GABLE-L | Unique; matches drawings |
| Length | 875 | One unit system per file |
| Width | 560 | Required for sheet parts |
| Qty | 2 | Collapse duplicates |
| Material | 18mm white melamine | Groups nests |
| Grain | lock | Exposed faces / doors |
Step 2: Enter or Import Parts
Type small lists by hand. For kitchens, import CSV/XLSX from Excel or your design export. Map length, width, quantity, and labels carefully.
No account is needed to try it, and the free tier does not count the optimizing itself — parts can be edited and re-nested indefinitely. It counts finished PDFs and new projects, at 3 a day. Lists are limited to 20 rows, CSV and XLSX uploads to 5 rows per file, and work does not survive the session.
Free CSV import stops at five rows. Real kitchens need paid import headroom. Pro starts at $12/mo.
- 3 PDF exports per day (editing and re-optimizing unlimited)
- 20 part rows per session
- CSV/XLSX import up to 5 rows
- 3 AI plan scans and 3 3D CAD imports per month on the free tier
- No saved projects until you sign up for a paid plan
Step 3: Set Stock Sizes and Kerf
Add sheet stock your yard actually sells (for example 2440×1220 mm or 4x8 ft). Set kerf to the blade or CNC bit you use for breakdown. Wrong kerf silently steals yield on every sheet.
- Match sheet size to purchased stock, not nominal catalog guesses
- Use separate stock for different thicknesses and colors
- Include trim allowance if your process rips factory edges first
- Document kerf in the job notes so the next estimator repeats it
Step 4: Lock Grain on Visible Parts
Flag grain on door slabs, exposed gables, and finished interiors. Leave grain free on hidden carcass parts when your material allows rotation. Frameless melamine shops feel this step most; wrong grain is a client callback.
Step 5: Nest Sheet Parts
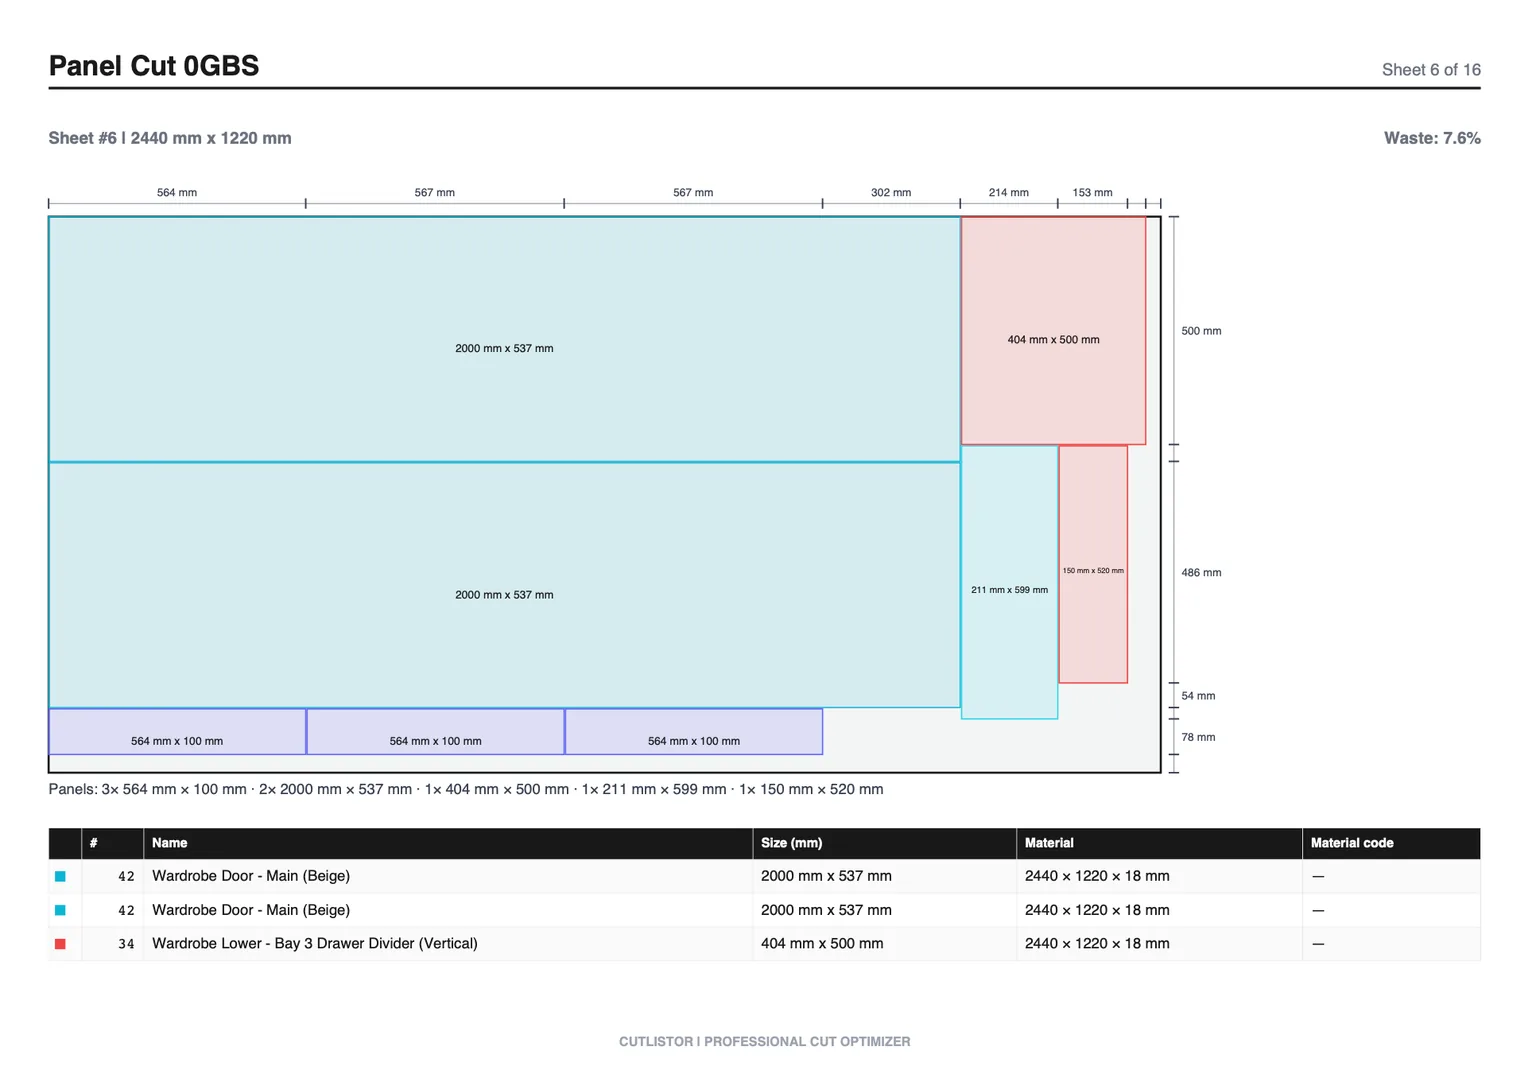
Run the sheet optimizer. Compare layout methods if your tool offers them (least waste vs rip-friendly vs CNC-friendly). Check sheet count against the quote. Re-edit any wrong size; in Cutlistor the layout refreshes as you edit.
Step 6: Pack Linear Sticks Separately
Face frames, cleats, toe-kick stock, and scribe fillers belong in the linear optimizer. Do not fake sticks as skinny sheet parts. Enter stick stock lengths your supplier sells and nest cut lengths with kerf.
Step 7: Export Plans the Floor Will Use
| Export | Free Cutlistor | Paid Cutlistor |
|---|---|---|
| PDF cut plans | Yes (daily cap) | Unlimited for plan |
| Saved project | No | Yes |
| DXF | No | Yes |
| CSV/XLSX out | Yes | Yes |
Cabinet Optimizer Checklist
- BOM uses finished sizes and one unit system
- Materials split by thickness and finish
- Kerf matches the breakdown tool
- Grain locked on visible faces
- Sheet nest reviewed for sheet count vs quote
- Linear sticks nested on real stock lengths
- PDF labels match shop marking conventions
Conclusion
Using a cabinet cut list optimizer is a repeatable shop skill: clean BOM, correct kerf and grain, sheet nest, linear nest, PDF out. Cutlistor makes the middle steps fast in the browser; free-tier caps tell you when a kitchen needs Pro.
Practice on a past job in the free sheet optimizer, then compare sheet count to what you actually bought.