
Article
How to Cut Plywood Efficiently (Layout, Kerf & Yield)
Cutlistor Team3 min read
Introduction
Plywood efficiency is not only a sharp blade—it is layout. Two shops can cut the same cabinet list and finish one sheet apart because one nested with kerf and grain and the other sketched rectangles on the sheet face.
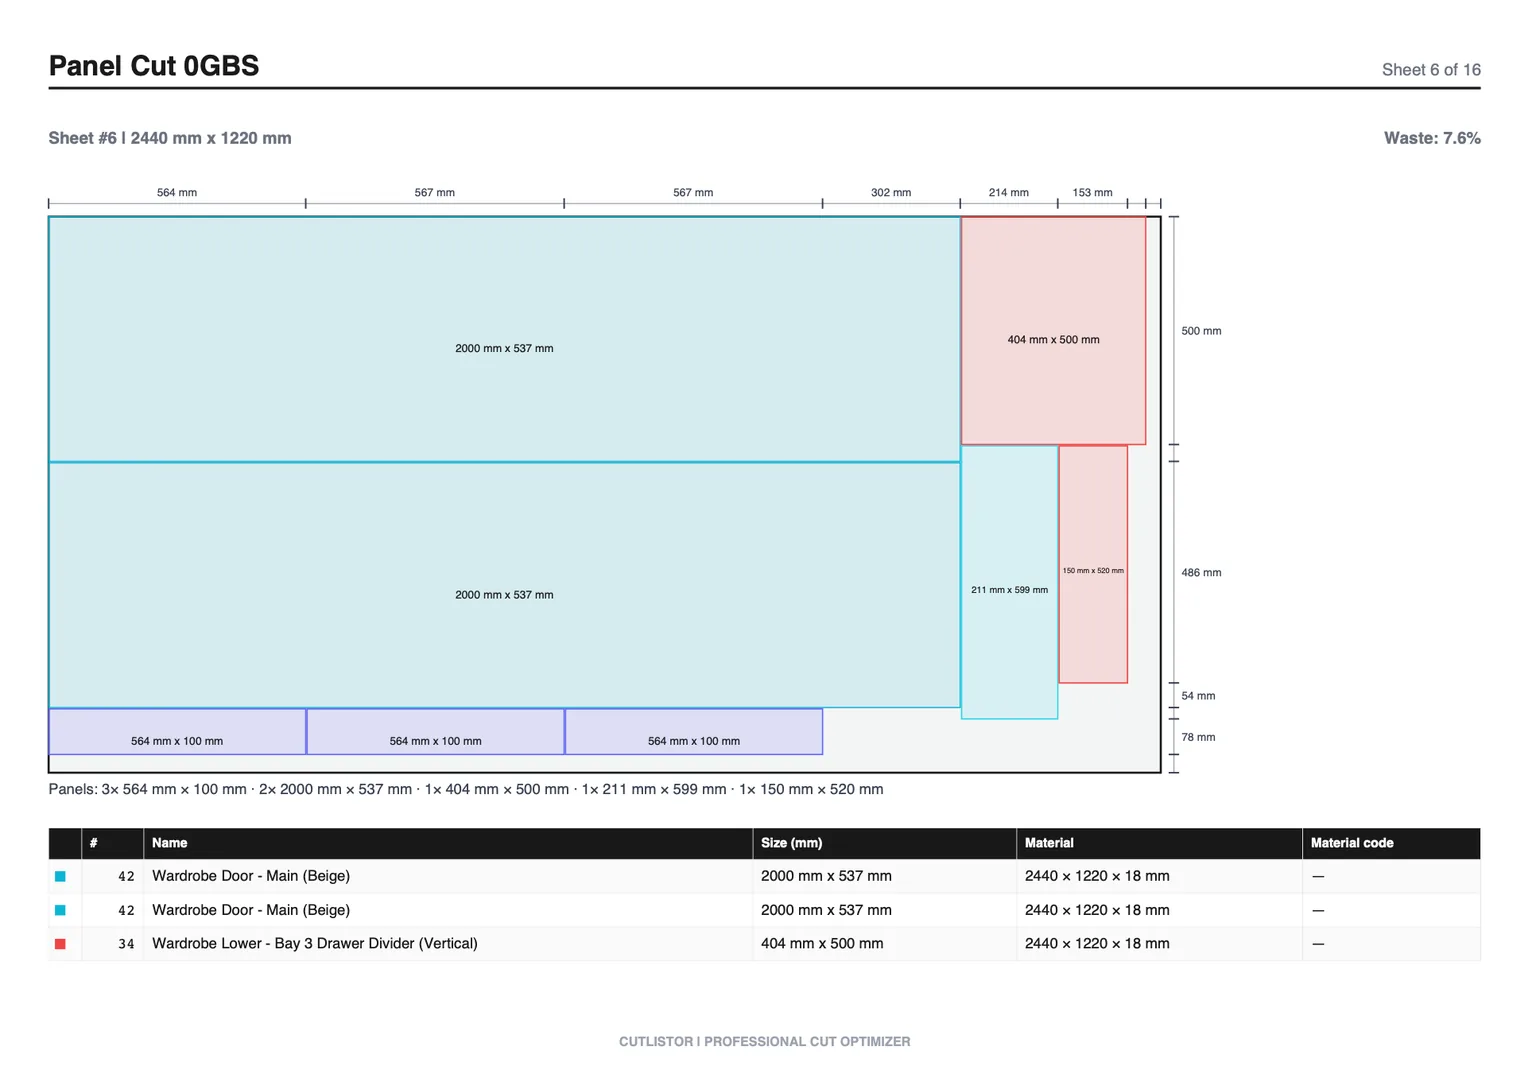
This guide covers layout strategy, kerf, grain, cut sequence, and how Cutlistor’s sheet optimizer turns a part list into a high-yield nest and PDF cut plan.
Start with a complete part list
List every panel with finished or blank size, quantity, material thickness, and grain needs. Import CSV/XLSX or take off from PDF/3D. Guessing from memory is how shelves get forgotten until the sheet is gone.
Account for kerf and usable sheet size
| Setup | Typical kerf to model | Notes |
|---|---|---|
| Thin-kerf table saw rip | ~2.4–3.2 mm (3/32–1/8 in) | Measure your blade |
| Full-kerf framing blade | ~3.2 mm+ | Worse yield; update setting |
| Track saw | Blade-dependent | Same rule: measure |
| CNC spoilboard cut | Bit diameter (+ optional offset) | Match CAM |
| Panel saw with scorer | Main + process allowance | Confirm on scrap |
Respect grain—then optimize rotation where free
Lock grain on show faces, door skins, and matched runs. Allow rotation on hidden parts, cleats, and utility panels so the optimizer can recover yield. Never unlock a show face to save a few percent of sheet.
Nest in software before marking the sheet
Run Cutlistor’s sheet optimizer with your stock (4×8, 5×5, metric 2440×1220, etc.). Compare yield and sheet count. Export a labeled PDF. Paid plans can export DXF for CNC. Re-optimize instantly when a dimension changes.
Efficient cut sequence on the saw
- Cut larger parts first when the nest implies it
- Label immediately—do not stack unlabeled panels
- Keep factory edge as reference only if it is straight
- Use zero-clearance or scoring for melamine chip-out
- Return usable offcuts to a measured remnant rack
Yield and the cost of a “close enough” layout
One extra birch sheet on a kitchen run can erase hours of shop profit. Batch small jobs onto shared sheets when materials match. Track remnant value—see true cost of wood waste and optimizer savings examples.
Common plywood efficiency mistakes
- Nesting without kerf
- Mixing thicknesses on one sheet code
- Ignoring grain on adjacent show panels
- Buying sheets from square footage alone
- Cutting before materials acclimate
- No remnant inventory—new sheets for small parts
Staging Sheets on the Floor
Efficiency is half nest, half staging. Print sheet numbers that match how you lean sheets against the wall. Cut all parts from sheet 1 before flipping to sheet 2 so you are not hunting labels across a pile.
Support full sheets when ripping. Unsupported melamine and veneered plywood chip on the exit face and force remakes that erase any nesting gain. A track saw or table with outfeed beats heroic balancing on sawhorses.
When an offcut is large enough for a known upcoming part (backs, drawer bottoms), label it immediately with size and material. Unlabeled offcuts become landfill with a second handling cost.
- Sheet order on the print matches physical stack order
- Exit-face support on veneered and melamine stock
- Minimum offcut size your shop will actually reuse
- Remakes logged so yield math stays honest
Next steps
Pair this with lumber planning for mixed builds. Furniture and small-shop software guides cover tool choice. Calculators help estimate before you open a full nest.