Article
Sheet Metal Nesting: Rectangular Layouts, Kerf, and Yield for Fabricators
Cutlistor Team6 min read
Introduction
Sheet metal nesting is the process of arranging flat parts on plate or coil blanks so you cut more paid area and throw away less scrap. Every laser, plasma, waterjet, and shear line depends on a layout before the first torch or blade moves.
Nesting sounds like one word, but it covers two very different problems: rectangular panel packing for boxes, brackets, and gussets, and true-shape nesting for irregular outlines with holes and tabs. Most fab quoting starts with rectangles, even when the final part is more complex.
This guide explains what sheet metal nesting is, how kerf and grain affect yield, which layout strategies shops use, and where Cutlistor's rectangular 2D optimizer fits compared with full CAM nesting suites. For the broader metal workflow, see our metal fabrication hub.
What is sheet metal nesting?
Nesting takes a list of finished part rectangles (width, height, quantity) and a stock sheet size, then computes where each part sits on the sheet with spacing for kerf between cuts. The output is a cut plan: how many sheets you need, where each part goes, and how much area is leftover.
Good nesting reduces purchase cost and machine time. Bad nesting looks fine on a spreadsheet until you discover you bought an extra plate because someone ignored kerf or used the wrong stock footprint.
- Input: part sizes, quantities, stock sheet dimensions, kerf, optional grain lock
- Output: sheet count, nested diagram, yield percentage, remnant sizes
- Goal: maximize paid part area per dollar of plate purchased
Rectangular nesting vs true-shape nesting
| Factor | Rectangular (Cutlistor) | True-shape (CAM nesting) |
|---|---|---|
| Part model | Width × height rectangles | Full contour geometry |
| Typical stock | Plate, sheet, coil blanks | Plate with common edge trim rules |
| Algorithm style | Guillotine / shelf / maxrects packing | Polygon nesting with hole awareness |
| Best for | Brackets, panels, base plates, flat patterns | Complex laser parts with tight scrap targets |
| Setup time | Minutes in a browser | DXF prep, machine post, license |
| Cutlistor fit | Core product | Use dedicated CAM; export DXF from Cutlistor on paid plans |
Kerf and grain on metal sheets
| Process | Typical kerf range | Notes |
|---|---|---|
| CO2 / fiber laser | 0.1-0.3 mm | Varies with thickness and assist gas |
| Plasma | 1.0-2.0 mm | Wider on thick plate |
| Waterjet | 0.8-1.2 mm | Stream diameter plus taper allowance |
| Shear / guillotine | 2.0-4.0 mm | Match factory setup card |
| Router on thin aluminium | 3.0-6.0 mm | Kerf equals bit diameter |
Common nesting strategies
Most rectangular optimizers, including Cutlistor, compare multiple packing methods so you can pick the layout your machine can execute without impossible cuts.
Guillotine / rip-and-crosscut
Parts are grouped into strips with straight rip cuts, then crosscut into finished sizes. Panel saws, beam saws, and many shear-nest workflows prefer this pattern because every cut runs full width or full height of a zone.
Shelf packing
Parts are placed in horizontal shelves sorted by height. Good when you have many mixed-height rectangles and want a readable diagram for manual marking.
Maxrects-style packing
Places each part into the largest free rectangle remaining on the sheet. Often improves yield when part sizes vary widely, at the cost of more complex cut paths on some machines.
Yield metrics that matter
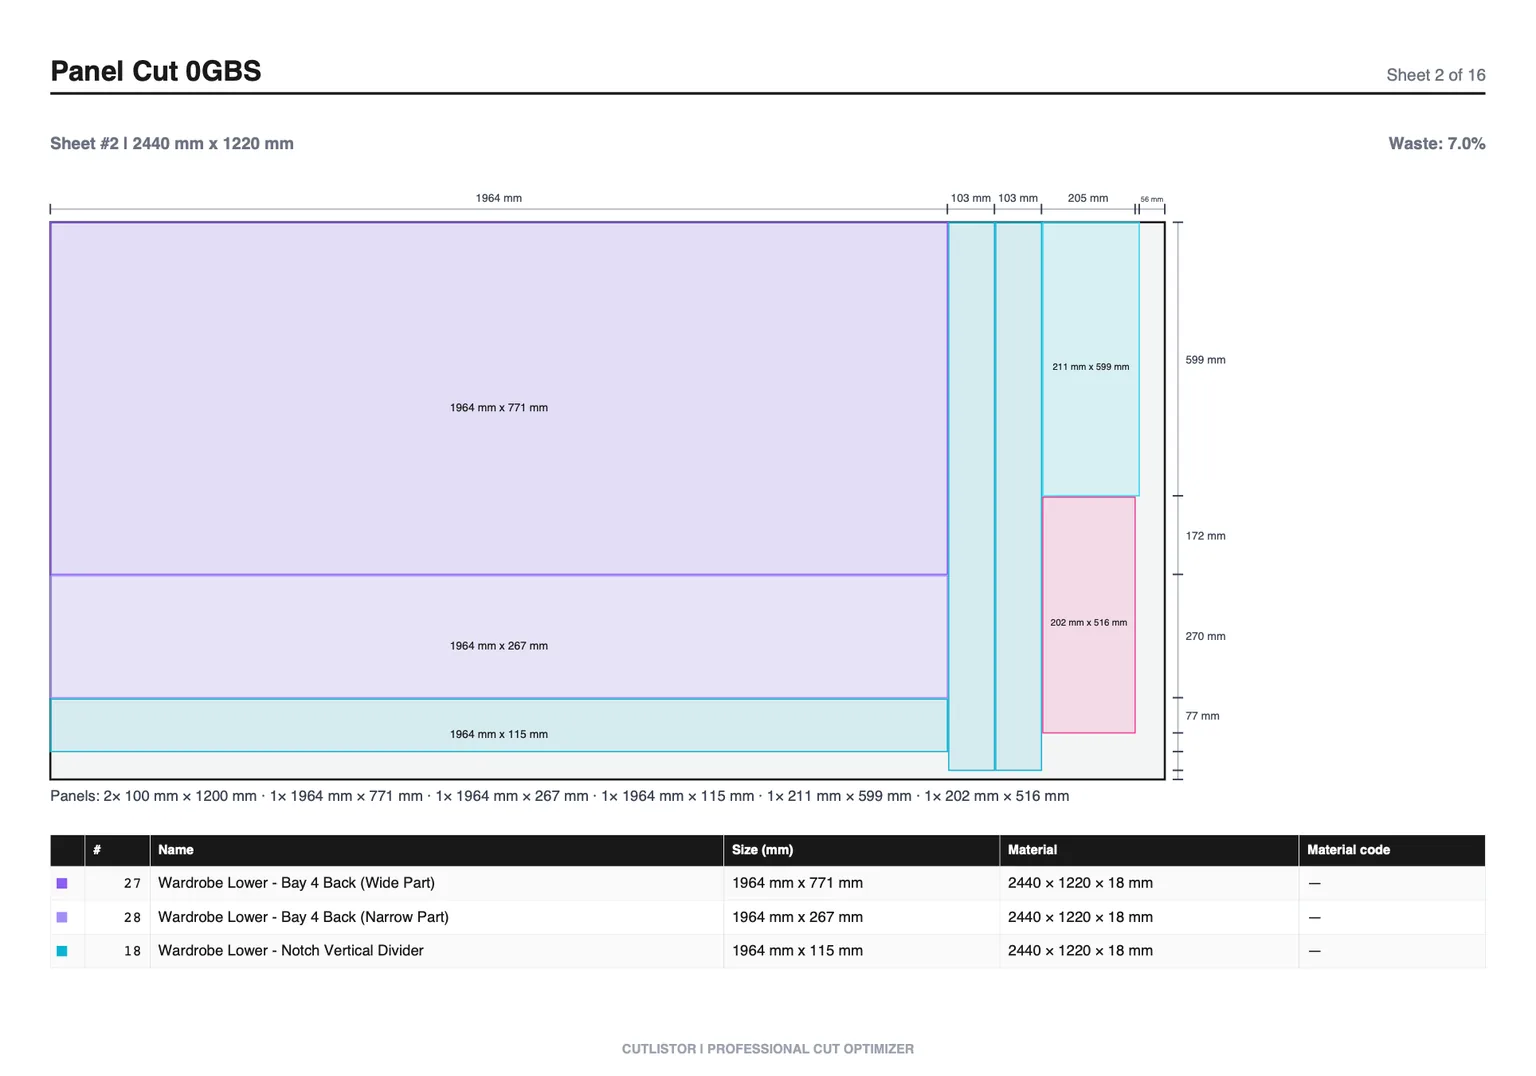
Worked example: six brackets at 400 × 300 mm on 3000 × 1500 mm mild steel plate with 2 mm kerf. Gross sheet area is 4.5 m². Part area is 6 × 0.12 m² = 0.72 m². Before kerf, naive yield is 16%. After nesting with kerf gutters, a good rectangular layout might reach 78-85% on one sheet if parts pack tightly, or force a second sheet if grain locks rotation. Always read optimizer yield, not spreadsheet area math.
| Metric | Formula (conceptual) | Use |
|---|---|---|
| Part yield | Part area ÷ sheet area used | Quote accuracy |
| Kerf loss | Kerf × cut length summed | Blade or torch tuning |
| Remnant area | Unused rectangles above min reuse size | Scrap inventory |
| Sheets required | Optimizer output | Purchase order |
When Cutlistor fits vs CAM nesting
Free use is genuinely unmetered where it matters for cutting: change a dimension, re-nest, change it again, at no cost. The 3-per-day allowance covers PDF exports and new projects. Cut lists stop at 20 rows, imported CSV or XLSX files at 5 rows, and there is no persistence between visits.
- 3 PDF exports per day (editing and re-optimizing unlimited)
- 20 part rows per session
- CSV/XLSX import up to 5 rows
- 3 AI plan scans and 3 3D CAD imports per month on the free tier
- No saved projects until you sign up for a paid plan
Worked example: base plate nest
Job: twelve gussets 250 × 180 mm, four feet 120 × 80 mm, kerf 2.5 mm plasma, stock 2500 × 1250 mm mild steel, grain not constrained.
Step 1: Enter stock once with correct supplier dimensions (not nominal 8 × 4 if your mill ships 98 × 49 in).
Step 2: Add all parts with quantities; group by thickness and grade.
Step 3: Set kerf to 2.5 mm measured from a test coupon on your table.
Step 4: Compare layout methods in Cutlistor and read sheet count and yield.
Step 5: Export PDF for the nest review meeting; export DXF on a paid plan if the laser cell needs geometry.
Result: a single-sheet nest might show 82% yield with a reusable 180 × 600 mm remnant along one edge. Tag that remnant in inventory instead of scrapping it.
Cutlistor sheet nesting workflow
Open the free sheet cut list optimizer, add your plate SKU dimensions, enter rectangular parts, set kerf and grain, then review live layouts. Editing parts and re-optimizing is unlimited on the free tier; PDF export and starting new projects count against the daily allowance.
For mixed metal jobs, run sheet nesting here and linear nesting for tube or angle in the separate linear tool. Keep PDFs in one job folder so purchasing sees both plate and stick counts.
- Import CSV or XLSX when the BOM already lives in a spreadsheet
- Compare multiple rectangular packing methods before you commit
- Lock grain on brushed or tread faces when rotation is not allowed
- Save projects and stock libraries on paid plans for repeat SKUs
Conclusion
Sheet metal nesting is not one algorithm for every part. Rectangular packing with kerf-aware guillotine, shelf, and maxrects-style layouts covers most fab quoting and shear planning. True-shape CAM nesting still wins on complex laser contours.
Measure kerf, match real stock sizes, read yield before you buy plate, and reuse remnants when the optimizer surfaces them. Cutlistor gives you fast rectangular nesting in the browser with PDF cut plans today, and DXF export when you are ready to hand off to the machine cell.