Article
How to Create Cabinet Cut Lists From 3D Models
Cutlistor Team4 min read
Introduction
3D models are how many cabinet shops sell the job. Cut lists are how they buy sheet goods. Bridging the two without retyping every gable is a commercial workflow, not a hobby trick.
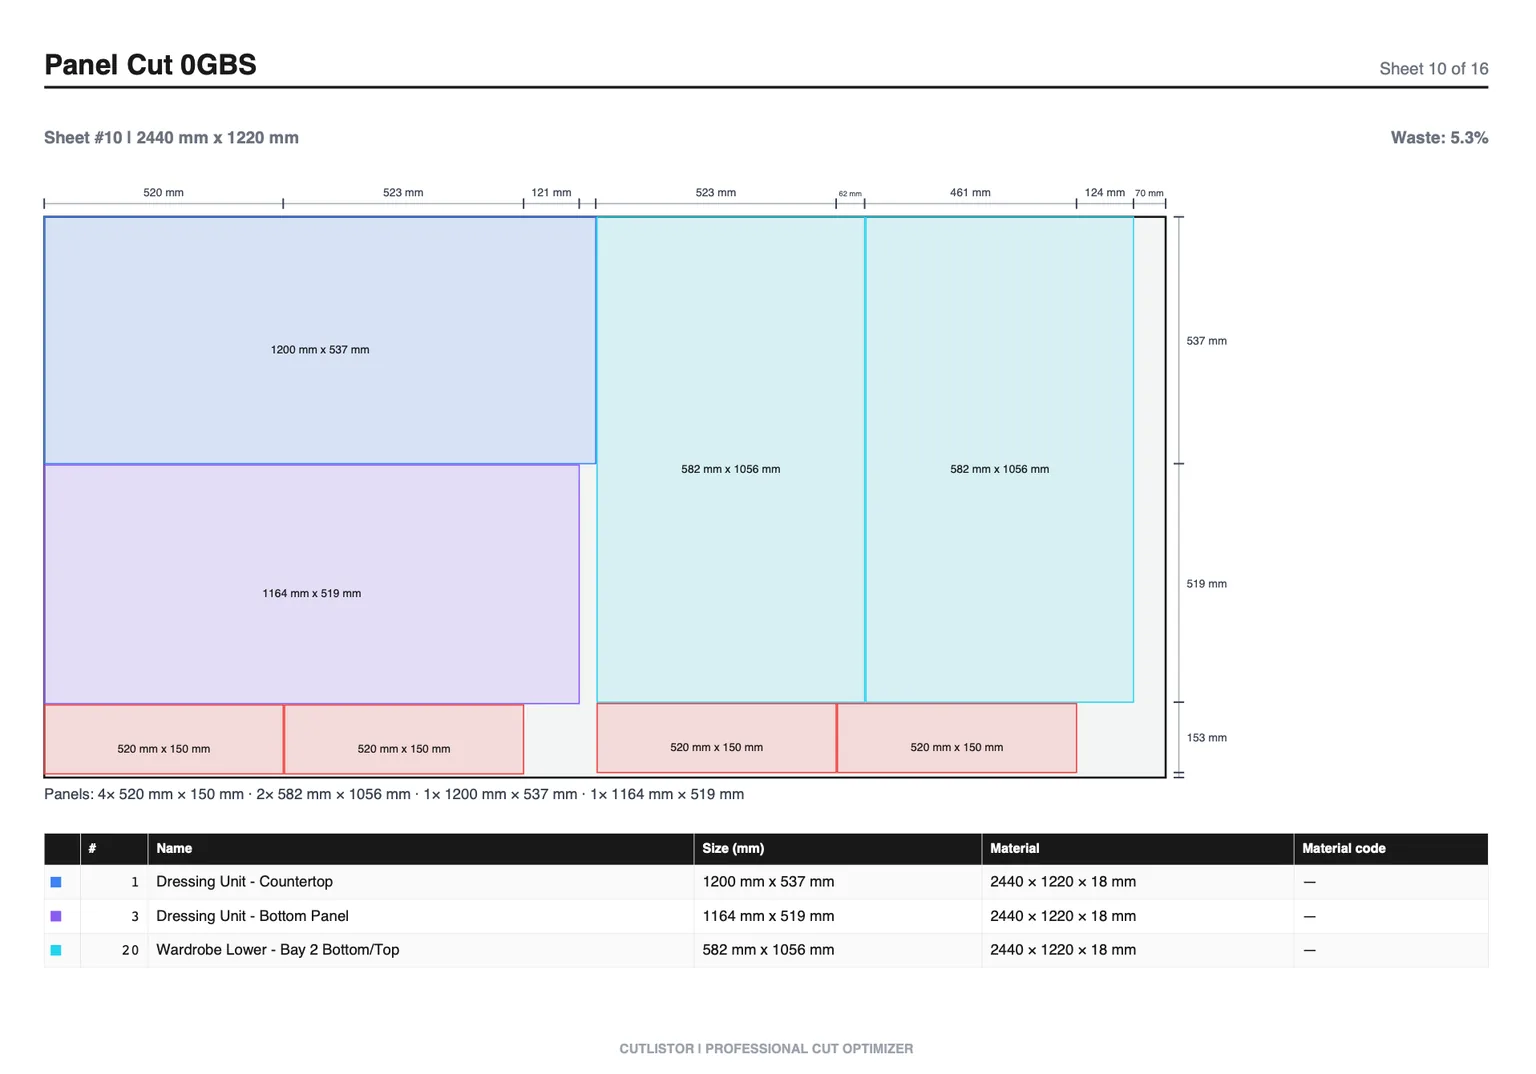
This guide covers practical paths from model to nest for cabinet makers: SketchUp plugins, Rhino exports, design-suite lists, and Cutlistor 3D/CAD import with honest quota limits.
Four Paths From Model to Nest
| Path | Best when | Nest happens in |
|---|---|---|
| OpenCutList in SketchUp | You design cabinets in SketchUp | Plugin layouts / export |
| Design suite list (Vision / Mozaik / SketchList) | Construction methods + CNC matter | The suite itself |
| Model → Excel/CSV → optimizer | Office already lives in spreadsheets | Cutlistor or similar |
| Model mesh import (glTF/GLB/Collada) | You can export clean meshes | Cutlistor (quota-based) |
Path A: SketchUp + OpenCutList
Model cabinets as solid parts with real thicknesses. Use OpenCutList to generate the cut list and layouts from the model. Export or copy sizes into Cutlistor if you prefer browser nesting, PDF workflows, or linear stick packing outside SketchUp.
Path B: Rhino and Other CAD
Rhino and general CAD users usually extract bounding box sizes or schedules, then land in Excel/CSV for the optimizer. Keep naming consistent with shop labels so the PDF nest matches the model tree.
Path C: Cabinet Vision, Mozaik, SketchList
These platforms are design systems that can emit cut lists and machining. If your nest and CNC output inside the suite already work, you may not need a second optimizer. Use Cutlistor when you need a fast what-if nest, a spreadsheet handoff, or rectangular planning outside the suite license seats.
Path D: Cutlistor 3D / CAD Import
Cutlistor accepts 3D CAD meshes (glTF, GLB, Collada) on quota-limited imports, plus AI plan scanning from drawings. Treat mesh import as a takeoff aid: verify every critical size before you buy sheets.
The distinction that matters on the free plan is between reworking a layout and shipping one. Rework is unlimited. Shipping — a PDF export, or opening a new project — comes out of 3 per day. Alongside that sit a 20-row list cap, a 5-row limit per CSV or XLSX import, and no saved state.
Free tier includes limited monthly 3D imports. Heavier kitchen modeling workflows belong on Pro ($12/mo) or Business ($25/mo) where quotas rise.
- 3 PDF exports per day (editing and re-optimizing unlimited)
- 20 part rows per session
- CSV/XLSX import up to 5 rows
- 3 AI plan scans and 3 3D CAD imports per month on the free tier
- No saved projects until you sign up for a paid plan
Model Quality Checklist Before You Nest
- Panel thicknesses match purchased sheet goods
- Parts are separate solids, not a single fused mesh
- Grain direction is modeled or noted for export
- Hardware is excluded from cut part exports
- Units are consistent (mm vs inches)
- You verified a sample cabinet against a hand takeoff
After You Have the List
Once sizes exist, the rest matches any cabinet optimizer workflow: set kerf, nest sheets, pack linear sticks, export PDF, optionally DXF on paid plans.
Dimension Discipline on Cabinet Jobs
A model exports the geometry it was drawn with, which is not necessarily the size you want to cut. Decide before exporting whether modelled faces represent finished panels or pre-banding blanks, and state it on the cut list so nobody re-derives it downstream.
Models usually export every instance separately, so the same gable arrives as ten unique rows. Consolidate identical parts into a single quantity before nesting, and keep mirrored pairs explicitly marked so grain does not resolve the same way on both.
When a dimension changes, fix it in the model and re-export rather than editing the cut list directly. Two sources of truth diverge immediately, and the model is the one the next person will trust.
Write the export settings into your modeling standard so the next model leaves CAD already fit to nest.
- One source of truth for openings vs carcase blanks
- Job number and revision date on every printed plan
- Separate sheet goods from linear face-frame stock
- Re-nest after any size change that touches a bought sheet
Conclusion
Creating cabinet cut lists from 3D models is a pipeline choice: plugin inside SketchUp, list inside a design suite, Excel bridge, or quota-based mesh import into Cutlistor. Verify sizes, then nest with kerf and grain like any other BOM.
If your model already exported to a spreadsheet, jump to the cabinet BOM import guide and nest the kitchen in the browser.