
Article
How to Plan Lumber Cuts (1D Optimization for Hardwood & Trim)
Cutlistor Team3 min read
Introduction
Solid lumber and trim are one-dimensional problems: you pack cut lengths onto stock sticks. Spreadsheet guesses leave long offcuts and short pieces that do not fit the next rail. Linear cut list optimization places every length with kerf so you buy and cut fewer boards.
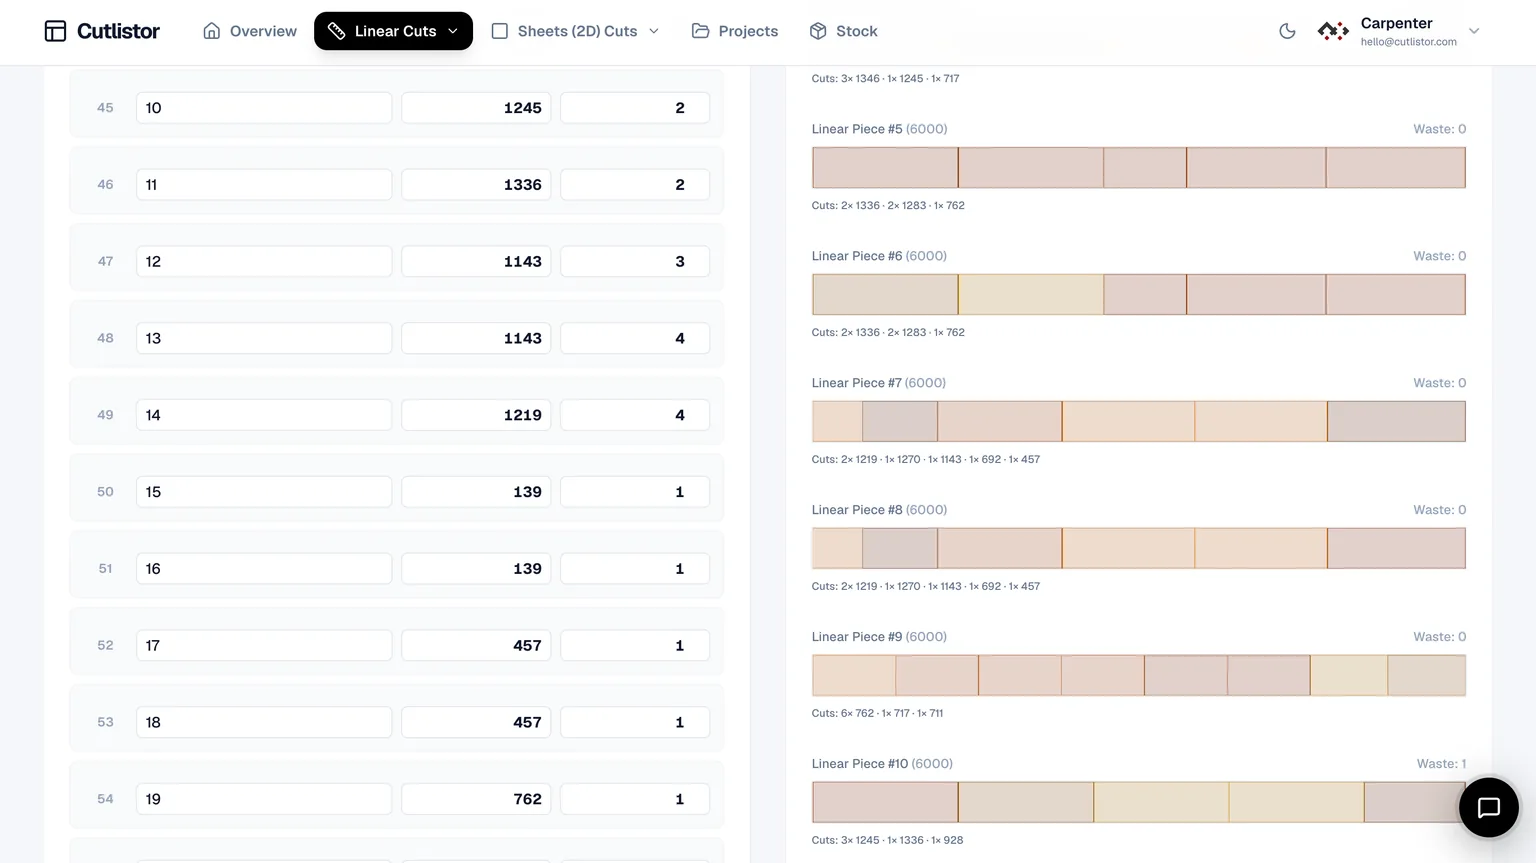
This guide covers rough-mill planning, defect strategy, face frames and moulding packages, and how to run Cutlistor’s free linear optimizer alongside sheet nesting for mixed furniture jobs.
When to use 1D lumber planning
| Job | Stock | Tool |
|---|---|---|
| Table apron set | 8/4 cherry boards | Linear optimizer |
| Face frames | 4/4 poplar rips | Linear (after rip width chosen) |
| Baseboard package | 16 ft MDF moulding | Linear optimizer |
| Plywood carcass | 4×8 birch | Sheet optimizer |
| Mixed dresser | Ply + hardwood | Both tools |
Step 1: List finished lengths and oversize rules
For each part, record cut length, quantity, species/grade, and whether you need extra for tenons or final trim. Group by cross-section (same thickness × width) so stock rows match what you will rip.
- Cut length including joinery allowance
- Quantity
- Cross-section / blank size
- Grade (clear, paint, knotty OK)
- Project label if batching
Step 2: Enter stock lengths and kerf
Use the lengths you actually buy or have on the rack (8 ft, 10 ft, 12 ft, random hardwood lengths). Set kerf for the crosscut blade or chop saw. If you rough-mill first, update usable lengths after defecting.
Step 3: Plan around defects and grade
Practical approach for hardwood:
- Sticker and acclimate; joint and plane to thickness
- Chalk defect zones; measure clear runs
- Enter clear-run lengths as stock in the linear tool
- Assign show parts to clearest stock; paint-grade to lesser boards
- Re-optimize when a board yields differently than expected
Step 4: Run the linear optimizer and export
Open the free linear cut list optimizer, import CSV/XLSX or enter lengths, add stock, set kerf, and review stick-by-stick sequences. Export a PDF for the chop station. Paid DXF helps when a CNC or automated saw needs geometry. Layouts refresh as you edit—useful mid-job when a board is rejected.
Trim and moulding packages
Room trim packages are classic 1D problems: many short cuts from long sticks. Batch rooms that share profile. Label parts by room and wall. Combine leftover sticks across jobs when profiles match—see multi-project optimization.
Mixed furniture: lumber + plywood
Plan lumber cuts and plywood nests as sibling tasks with one revision ID. Do not wait until carcasses are glued to discover apron stock is short. Furniture planning and furniture-maker software guides cover the full loop.
Lumber-Yard Habits That Save Bars
Buy stock lengths that match your linear nest, not habit. If the nest wants eight 10 ft sticks and you always buy 12s “just in case,” you are paying for offcut you already knew about.
Call out defect allowances on the list: clear face vs paint grade, knot zones you will cut away. A linear optimizer packs lengths; it cannot see a knot in the middle of a stile blank until you shorten that blank on purpose.
Keep a short remnant rack for sticks over a minimum length your face-frame and trim work actually uses. Remnants shorter than that minimum are scrap—stop carrying them around the shop.
- Stock lengths chosen from the nest, not from memory
- Defect and grade notes on critical parts
- Remnant minimum length posted on the rack
- Kerf re-measured after blade changes
Next steps
Compare linear tools in our best linear optimizers roundup. For sheet goods, use the plywood efficiency guide. Small shops may want the dedicated software article next.