Article
How to Import an Excel Cut List Into a Cut List Optimizer
Cutlistor Team3 min read
Introduction
Most shops already keep cut lists in Excel. Re-typing those rows into an optimizer invites typos. Cutlistor imports XLSX (and CSV) so your spreadsheet BOM becomes nestable parts in the browser.
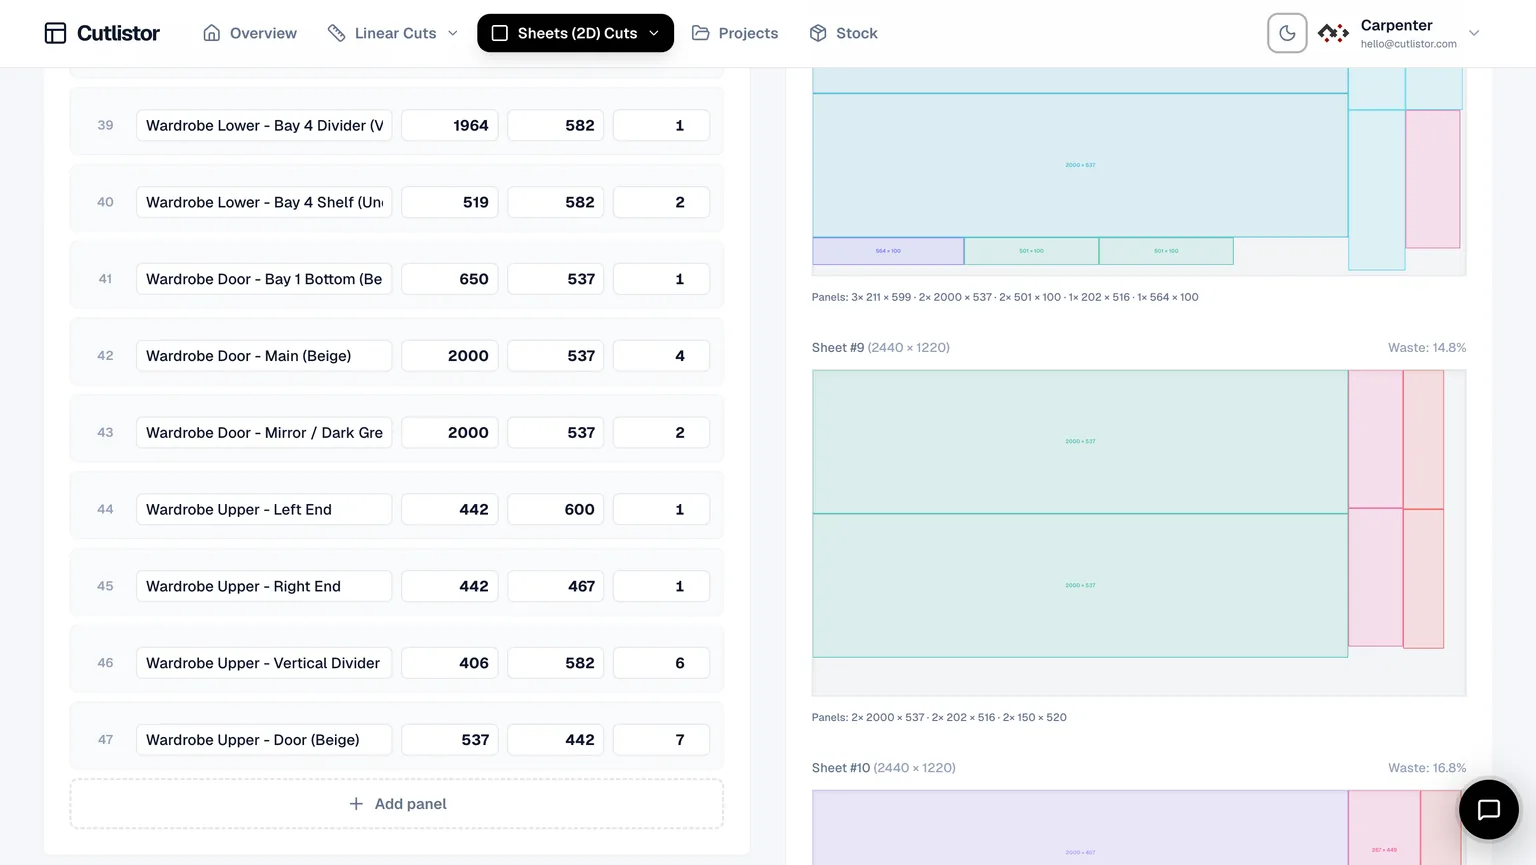
This guide shows how to structure the workbook, import it, fix common mapping issues, and move from Excel rows to a PDF cut plan—with honest free-tier limits.
Why import instead of nesting in Excel alone
Excel is excellent for BOMs, formulas, and client quotes. It is a poor rectangle packer. Import keeps Excel as the source of truth for sizes and quantities while Cutlistor handles kerf-aware sheet nesting and linear stick packing, then PDF (and paid DXF) export.
Step 1: Prepare the workbook
| Column | Example | Required? |
|---|---|---|
| Name / Label | A-SIDE-L | Recommended |
| Length | 720 | Yes |
| Width | 610 | Yes for sheet parts |
| Quantity | 2 | Yes |
| Material | 18mm birch | Recommended |
| Thickness | 18 | Optional if in material |
| Grain | lock / free | Optional |
| Notes | show face | Optional |
Step 2: Import XLSX into Cutlistor
The free tier draws its line at output, not at effort. Rearranging parts and re-running the nest as many times as you like costs nothing; the daily allowance of 3 is spent only when you export a PDF or open a new project. Sessions hold up to 20 part rows, CSV and XLSX files import up to 5 rows each, and closing the tab clears the work.
Step 3: Choose sheet vs linear import path
Plywood, MDF, and melamine panels go through the sheet optimizer (length × width). Hardwood boards, trim, and face-frame stock go through the linear optimizer (length only). Import the matching sheet of your workbook into each tool.
Step 4: Add stock, set kerf, export
Enter purchased stock sizes, set kerf, lock grain where needed, and review the live nest. Export a PDF cut plan. On paid plans, export DXF when CNC needs geometry. Re-optimize instantly when Excel sends a revised BOM—re-import or edit rows in place.
Troubleshooting common Excel imports
| Symptom | Likely cause | Fix |
|---|---|---|
| Sizes look 25× too big/small | mm vs inch mix | Normalize units in Excel first |
| Width missing | Linear-only columns | Add width or use linear optimizer |
| Import truncated | Free-tier row limit | Split file or upgrade for larger BOMs |
| Wrong columns mapped | Header synonyms | Rename headers to Length/Width/Qty |
| Merged cells break rows | Title formatting | Unmerge; single header row |
Shop workflow tips
Keep Excel as the quoting BOM. After client approval, freeze a revision tab, import that tab only, and name the PDF cut plan with the same revision. When batching jobs, include a Project column and prefix labels before import.
Excel Hygiene That Survives Hand-Off
Put the nestable BOM on its own sheet with a boring name like CutParts. Leave the pretty quote sheet alone. Merged title rows and color-coded “client view” tabs are why imports fail on Friday afternoon.
Use real numbers, not formulas that display rounded inches while storing 15 decimal places of noise. Paste values before export if your CAD-to-Excel path is noisy.
Name materials the way purchasing orders them. “White melamine 3/4” and “WM 19mm” as two names become two stock piles in the optimizer and inflate sheet counts.
- Dedicated CutParts sheet, one header row
- Values pasted; units consistent
- Material names match purchasing
- Sheet vs linear parts split before import
Next steps
Prefer CSV for simple exports from other apps—see the CSV guide. For takeoff from drawings or models, use PDF or 3D import. Compare savings with how much a cut list optimizer can save.