Article
What Is a Woodworking Cut List? Parts, Columns & Why It Matters
Cutlistor Team5 min read
Introduction
A woodworking cut list is the shop document that turns a cabinet, furniture, or millwork design into cuttable parts. Every panel, rail, stile, shelf, and stick of solid stock gets a label, finished size, quantity, and material group before anyone fires up a table saw or panel saw.
Generic cut-list definitions cover any trade. Woodworking adds grain direction, face veneer, edge banding, nominal lumber sizes, and the split between sheet goods (plywood, MDF, melamine) and linear stock (hardwood, softwood, moulding). Get those columns wrong and you buy the wrong sheets, rip against the grain, or show up one gable short on install day.
For the trade-agnostic definition, start with what is a cut list. This article goes deeper into woodworking columns, sheet vs lumber rows, and how Cutlistor nests both in the browser.
Woodworking Cut List vs Generic Cut List
Any cut list answers three questions: what parts, what sizes, how many. A woodworking cut list also answers which face is show, which way grain must run, whether the size is finished or rough, and whether the part comes from a sheet or a stick.
Cabinet shops often keep two linked lists: a sheet list for carcase panels and a linear list for face frames, doors, and trim. Furniture makers may merge them into one spreadsheet with a material column that routes each row to 2D nesting or 1D bar cutting.
- Sheet rows: length x width (and thickness), grain flag, face veneer notes
- Linear rows: cut length only, species or profile, stock length available
- Shared fields: part label, quantity, material SKU, edge or machining notes
- Shop extras: finished vs rough size, banding sides, left/right pairs
Columns That Matter in the Shop
| Column | Why it matters | Example |
|---|---|---|
| Part label | Matches drawings, barcodes, and cut diagrams | UPR-L, Shelf-A, FF-Stile-2 |
| Finished L x W (or length) | What the assembly needs after joinery | 720 x 560 mm panel |
| Quantity | Drives sheet and stick count | 4 gables, 12 rails |
| Material / thickness | Groups parts onto the same stock | 18 mm Baltic birch |
| Grain / face | Stops ugly rips and flipped veneer | Grain along height |
| Rough vs finished | Tells you when to leave oversized | Rough +3 mm for flush trim |
| Notes | Edge band, dado, hinge side, pair | Band long edges only |
Sheet Goods and Linear Stock on One Job
A base cabinet run is a mixed job. Sides, bottoms, and shelves nest on plywood. Face-frame stiles and rails cut from hardwood sticks. Toe kicks may be sheet or solid depending on the shop. Treat each material family as its own optimization problem.
Cutlistor handles both: 2D sheet nesting for panels and 1D linear optimization for lumber, with kerf and grain direction on sheet parts. Free tier allows unlimited editing, 20 part rows, CSV up to 5 rows, and 3 PDF exports per day in the browser — no install.
Worked sheet example
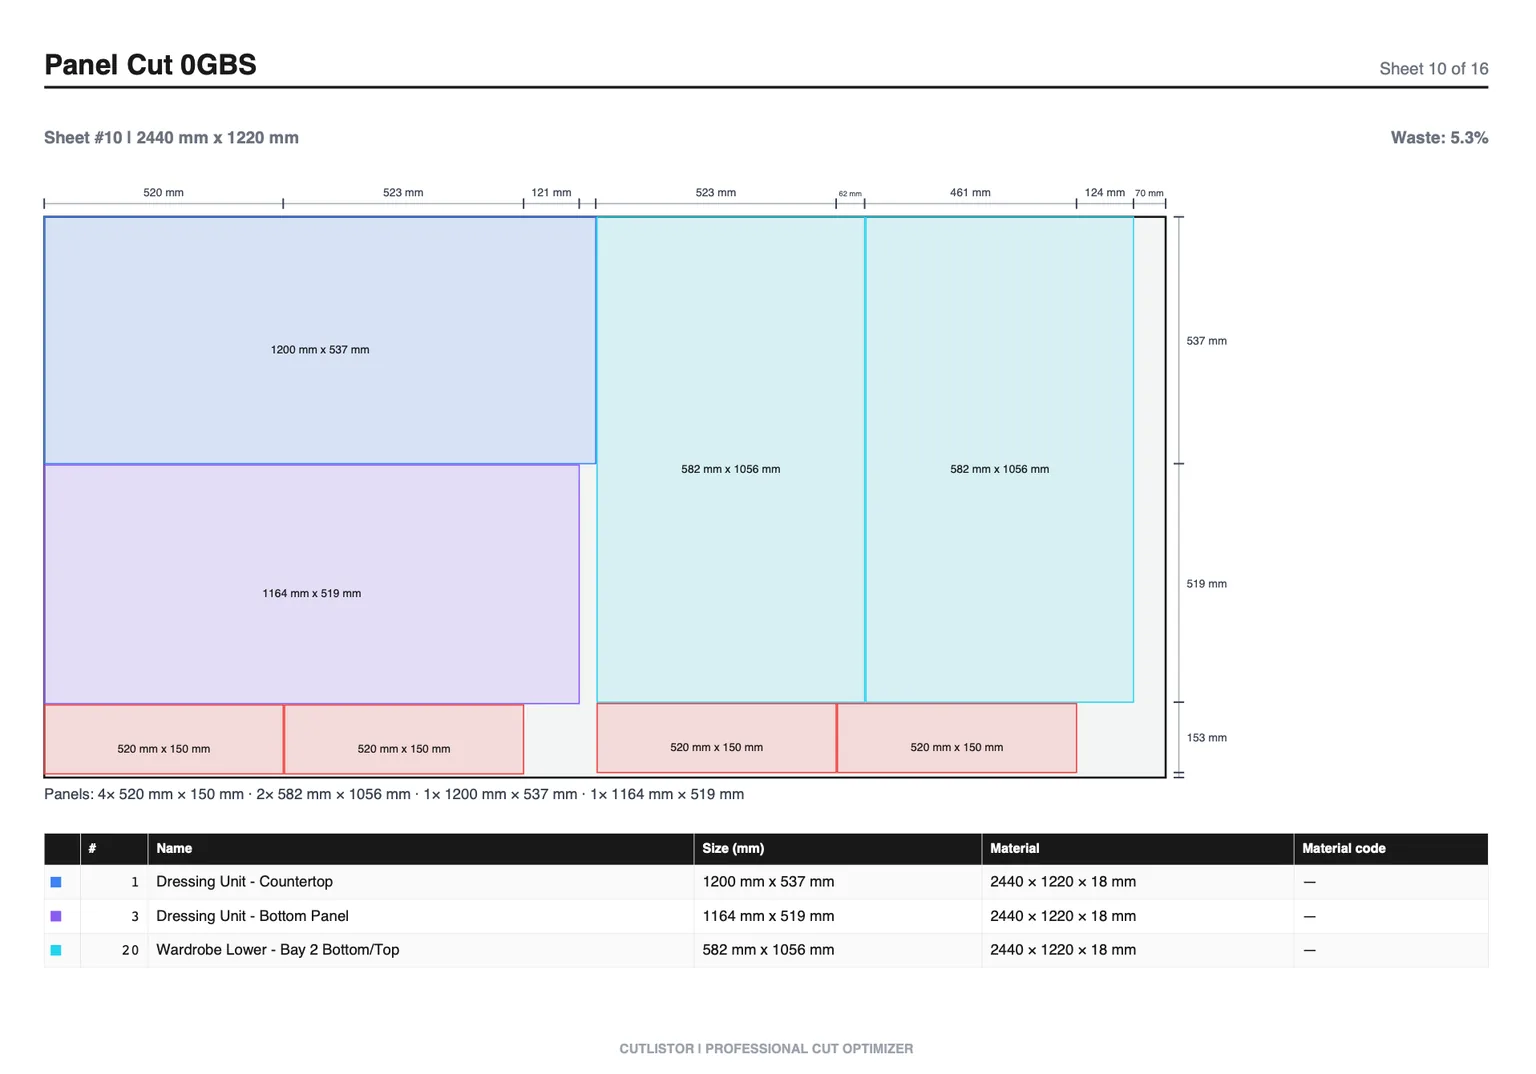
Six kitchen boxes need 12 gables at 720 x 560 mm and 6 bottoms at 560 x 560 mm from 18 mm birch plywood on 2440 x 1220 mm sheets. With a 3.2 mm table-saw kerf and grain along the 720 mm height, a nest typically lands near 3 sheets if grain is respected — more if you force every gable grain the wrong way and create unusable offcuts.
Worked linear example
The same job needs 24 face-frame stiles at 720 mm and 24 rails at 400 mm from 8 ft (2438 mm) S4S hardwood. With 3 mm kerf, a linear optimizer packs cuts onto fewer sticks than cutting every stile from its own board. Stock length choice (8 ft vs 10 ft) often changes stick count more than kerf tweaks.
Grain, Face Veneer, and Why Labels Matter
On veneered plywood and solid doors, grain direction is not optional. Mark which dimension must follow the grain, and which face is show. Left and right gables often need mirrored grain or paired faces so the run looks continuous.
Put grain in the cut list before nesting. Flipping a part after the PDF is printed is how shops cut against the grain and scrap a prefinished sheet.
From Cut List to Cutting Diagram
A cut list alone is not a cut plan. The list feeds an optimizer that places parts on sheets or sticks, subtracts kerf, and exports a labeled diagram. Operators then cut by label, not by memory.
Typical flow: freeze dimensions from drawings or CAD, enter or import parts (CSV/XLSX; AI PDF/image import on paid quotas), set stock sizes and kerf, nest, export PDF cut plans (DXF on paid). Then walk the floor with the same labels that appear on the diagram.
Why the Cut List Matters Before You Buy Stock
Material is ordered from the cut list, not from a sketch. Sheet count, stick count, and waste percentage decide whether a kitchen quote is profitable. A tidy list also makes hand-offs clear: designer to estimator to sawyer, each reading the same labels.
- Prevents underbuying (one missing shelf ruins an install)
- Prevents overbuying (extra Baltic birch sits for months)
- Makes yield visible before you pay the yard
- Gives the floor a single source of truth for sizes
Next Steps
If you are building your first woodworking cut list, start with labels, finished sizes, quantities, and material groups. Add grain and rough/finished flags once those basics are solid. Then run the sheet and linear optimizers before you buy stock.