Article
How to Plan a Cabinet Build
Cutlistor Team3 min read
Introduction
Planning a cabinet build is the work that happens before the first sheet hits the saw. For a production shop, planning covers openings, construction method, materials, hardware, cut lists, nesting, and the assembly sequence that protects margin.
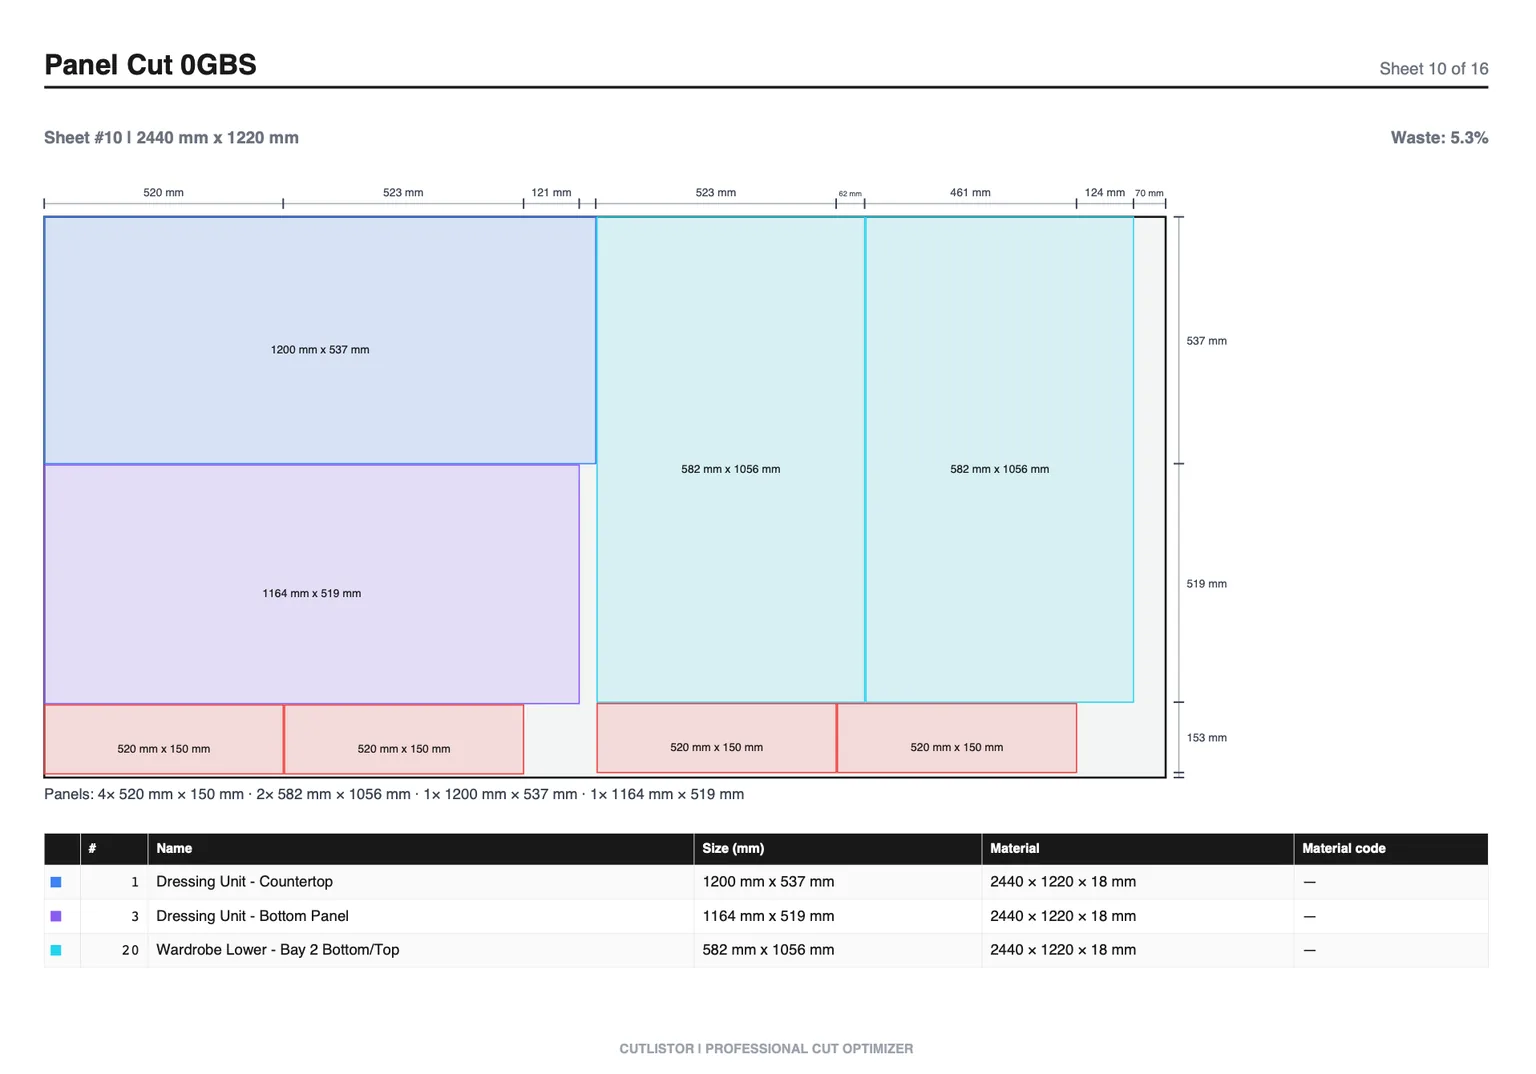
Skipping the plan creates the classic failure mode: beautiful 3D renders, then a sheet short on melamine and a drawer slide that does not fit the box. This guide is a practical planning sequence for single cabinets and small runs.
Step 1: Confirm Site Conditions and Design Intent
Measure wall-to-wall, floor-to-ceiling, plumb and square, appliance specs, and obstacle locations (outlets, pipes, windows). For kitchens, freeze the run layout before you size individual boxes. For a single vanity or pantry, freeze clearances and counter or top thickness.
- Finished openings and appliance gaps
- Scribe conditions at walls and ceilings
- Door swing and drawer clearances
- Client finish approvals (melamine, paint-grade, veneer)
- Hardware brand and overlay style locked in writing
Step 2: Choose Construction Method
| Decision | Affects |
|---|---|
| Frameless vs face frame | Door sizing, fillers, linear stock |
| Panel thickness | All case formulas and sheet SKU |
| Joinery | Part widths and CNC programs |
| Overlay style | Door and drawer front sizes |
| Slide type | Drawer box width and height |
Step 3: Spec Materials and Hardware BOM
List sheet SKUs (18 mm white melamine, woodgrain ends, 12 mm shelves if used, 6 mm backs), edge-band colors, lumber for frames, and hardware: hinges, slides, legs, shelf pins, screws. Hardware choices drive drawer box dimensions and hinge boring.
Step 4: Build the Cut List and Nest
Calculate case parts, doors, drawer boxes, fillers, and face-frame sticks. Nest sheets with kerf. Optimize linear stock separately. The sheet count from the nest becomes the purchasing number for the quote.
Most free optimizers meter the optimizing. Cutlistor does not — you can tweak parts and re-run the layout as often as a job needs. The daily ceiling of 3 applies to PDF exports and new projects only. Expect a 20-row cut list limit, a 5-row ceiling on each CSV or XLSX import, and no saved projects.
Step 5: Quote From Nested Materials, Not Square Feet Alone
| Cost bucket | Planning source |
|---|---|
| Sheet goods | Optimizer sheet count by SKU |
| Lumber / frames | Linear optimizer lengths |
| Hardware | Hardware BOM × unit cost |
| Edge banding | Perimeter estimate × waste factor |
| Labor | Shop hours by operation |
Step 6: Production Sequence
Order materials with lead times in mind. Cut and label, edge band, machine (hinge boring, dados, CNC), assemble boxes, hang doors, install drawers, then finish or pack. For CNC shops, prepare labeled nests and boring maps before the machine waits.
CAD and Drawing Handoffs
If the design lives in SketchUp, Rhino, or another modeler, export or extract parts into the cut list rather than redrawing. PDF elevations can seed takeoff, then verification locks the sizes. Cutlistor is not a replacement for design software; it handles nesting and cut plans after sizes exist.
FAQ
When should I build the cut list in the planning process?
After construction method, thicknesses, and hardware are frozen, and before you place the sheet PO. Earlier drafts are fine for ballpark quotes if you re-nest after final measure.
Does planning change for a full kitchen?
Yes. Kitchen runs add fillers, appliance panels, tall units, and batch nesting across many boxes. Use the kitchen cabinet run guide for that scale.
What does Cutlistor Pro add for planning?
Pro is $12/mo and adds saved projects, higher import quotas, and DXF export for CNC handoff. The free tier still supports editing and re-optimizing within daily PDF/project limits.
Conclusion
A solid cabinet build plan freezes site data, construction, materials, and hardware, then produces a nested cut list that drives purchasing and production. Quote from sheet count, not optimism.
Plan your next box in Cutlistor, export a PDF cut plan, and move into cutting with labeled parts and a clear assembly order.