Guide · 6 min read
What is a cutting plan?
A cutting plan is the document you work from once the design is settled and the parts are known: every piece of stock the job will consume, what comes off each one, in what order, and what is left. It sits between the cut list, which is just a table of parts, and the cutting itself. A good one gets material bought correctly and cut once. A bad one - or an absent one - is how a job ends up two sheets short on a Friday afternoon.
What a cutting plan contains
The plan is a set, not a single page. Treat any one diagram as a page of it rather than as the whole thing.
- A material summary: how many of each stock item to buy, per SKU
- One layout drawing per piece of stock, numbered and in cutting order
- The kerf assumed, stated once and applied everywhere
- A parts table per drawing, so parts can be counted off as they come
- The offcut from each piece, dimensioned and marked keep or scrap
- Overall yield, so the plan can be compared against an alternative
Everything else - hardware, finishing schedule, assembly order - belongs in the job pack alongside the cutting plan rather than inside it.
The cutting plan drawing
For sheet goods, the drawing is the stock rectangle with parts placed inside it to scale, each labelled with its name and finished size. The value is in the labelling as much as the geometry: two 764 × 300 panels that are a shelf and a top look identical on a diagram and are not interchangeable once one gets a rebate.
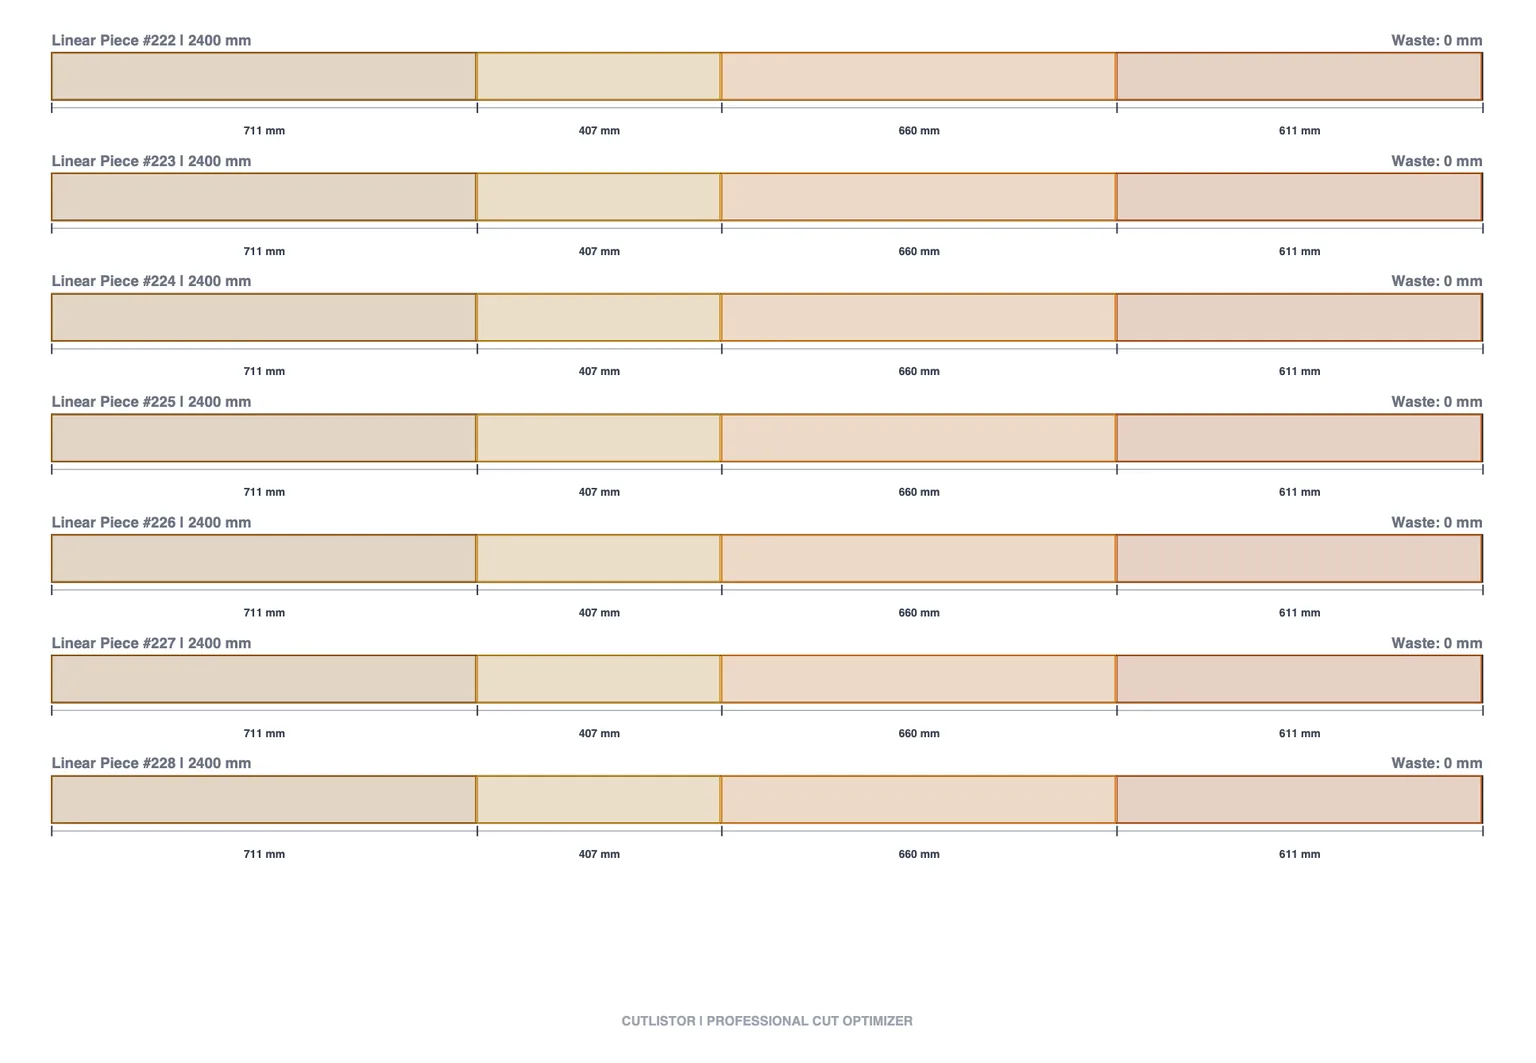
For linear stock, the drawing is a bar shown end to end with cut positions marked along it. Shops running a stop system usually prefer cumulative positions from the datum end, because that is what gets set on the machine, with individual lengths listed alongside as a check.
In both cases, mark the offcut. An undimensioned remainder is scrap by default, and that default costs real money over a year.
Cutting order is part of the plan
Two plans can consume identical material and differ enormously in how long they take to cut, because a layout is only as good as the sequence it implies.
On a table saw or panel saw, straight-through cuts across the full width are fast and repeatable; layouts that need a part removed from the middle of a sheet are not. This is the guillotine constraint, and it is worth accepting a slightly worse yield to keep it. On a CNC the constraint inverts: the machine does not care about straight-through cuts, but it does care that small parts stay held down until the last pass.
Sequence also drives setup. Grouping every cut at one fence setting before moving the fence saves more time on a long job than most yield improvements save in material.
How to make a cutting plan
The order matters, because every step depends on the one before it being right.
- Finalise the parts list with finished sizes - not nearly final, final
- Split it by material, thickness and finish; each group is planned separately
- Enter the stock size you will actually receive, not the nominal name
- Set kerf for the tool doing the cutting - blade width, or bit diameter on a CNC
- Lock grain only where it will be visible in the finished piece
- Run the layout, then read stock count before placing the material order
- Try a second layout strategy and compare; keep the one you would rather cut
- Export PDF, print one copy per station, and mark up the physical copy as you go
The free browser optimizers cover this end to end for a single material group: 20 part rows per session and 3 PDF exports a day, with unlimited re-running while you compare strategies.
Judging whether a plan is good
Yield is the obvious number - used area divided by purchased area - but it is a poor standalone target, because you can always improve it by making the plan harder to cut.
Judge a plan on four things instead: the stock count, since that is what you pay for; whether the sequence suits the machine; whether offcuts land in sizes you would genuinely reuse rather than dozens of unusable slivers; and whether a person who did not draw it can follow it without asking questions.
A plan at 88% yield with clean rips and two reusable offcuts beats a plan at 92% that needs three fence changes per sheet and produces confetti.
| Signal | Good plan | Plan worth redoing |
|---|---|---|
| Stock count | Matches or beats your estimate | One more than expected with no explanation |
| Cut sequence | Straight-through where the saw wants it | Parts trapped mid-sheet |
| Offcuts | Few, large, worth racking | Many, thin, unusable |
| Labelling | Every part named and sized | Identical-looking rectangles unlabelled |
| Kerf | Stated and matches the blade in the saw | Left at zero |
Sheet plans and linear plans in one job
Most real jobs use both forms of stock, and they must be planned separately - a panel and a length of 2×4 have nothing to say to each other in a packing algorithm.
Run the panels through a sheet optimizer and the sticks through a linear optimizer, then staple the two PDFs into one job pack. The material summary at the front should list both, because that is the page purchasing works from.
FAQ
- What is the difference between a cut list and a cutting plan?
- The cut list is the table of parts you need. The cutting plan is the set of layouts showing how those parts come off specific pieces of stock, in what order, with what left over.
- What is a cutting plan drawing?
- The scaled diagram of one piece of stock with the parts placed on it, labelled with names and finished sizes, plus the dimensioned offcut.
- Do I need cut planner software?
- For a handful of parts, squared paper is fine. Once a job has more than roughly twenty parts or more than one stock size, hand-planning reliably loses to software by a sheet or more.
- What yield should I expect from a cutting plan?
- It depends on how part sizes relate to stock sizes. Cabinet work commonly lands in the high 80s to low 90s; jobs with awkward part sizes land lower and no software will fix that without changing the design.
- Should a cutting plan include offcuts?
- Yes, dimensioned. An unmarked remainder gets treated as scrap, which is how usable material leaves the shop.
Related guides
- Standard cabinet widths and the 3-inch increment ruleWhy cabinet lines step in 3-inch increments, the full width table for base, wall and tall cabinets, and the part sizes each width produces.
- Cut list optimizer: free online sheet & linear calculatorWhat a cut list optimizer actually does: kerf, nesting, grain, offcuts and yield explained for sheet goods and linear stock, in plain shop language.
- Cutting list optimization that works in real shopsGuide to cutting list optimization: improve yield, apply kerf, compare sheet vs linear workflows, and use Cutlistor’s free optimizers for instant cut layouts.
- How to build a cabinet cut listHow to build a cabinet cut list and nest it on sheet stock: what to include, kerf-aware panel nesting, MDF/melamine/plywood sizing, and yield.