Calculator page · 5 min read
Cut list generator
A cut list generator turns whatever form your part information is currently in - a sketch, a spreadsheet, a PDF plan, a 3D model - into a clean table of parts with sizes and quantities, and then into a cutting layout you can take to the saw. The generating is the boring half; the useful half is what happens next. This page covers the four ways to get a list started, what a generated list should contain before you trust it, and how to turn it into stock counts you can order from.
Four ways to generate a cut list
Pick the one that matches where your information already lives. Retyping is the most common and least necessary step in the whole process.
| Starting point | Route | Good for |
|---|---|---|
| Nothing yet | Type parts directly into the optimizer | Small jobs, one-offs, quick checks |
| A spreadsheet | Import CSV or XLSX | Anyone already keeping lists in Excel or Sheets |
| A PDF plan or supplier sheet | AI plan scan, then review | Drawings you did not produce yourself |
| A 3D model | Import glTF, GLB or Collada | Work modelled in CAD before it is costed |
Typing and spreadsheet import are on the free tier; plan scanning and model import have monthly caps that are higher on paid plans.
What a generated list must contain before you trust it
A generator that produces a plausible-looking table is not the same as one that produces a correct one, and the failure mode is quiet. Check these before you order material.
- Finished sizes, not nominal ones - a 2×4 is 38 × 89 mm and the list should say so
- Internal dimensions that account for panel thickness, which is where imported lists most often go wrong
- One row per part type with a quantity, rather than duplicated rows
- Material and thickness on every row, spelled identically where it is the same stock
- A single unit system throughout - mixed millimetres and inches survive import and break layouts
- Grain flags on parts that will be visible, and only those
Scanned and model-derived lists especially deserve a read-through: the geometry is usually right and the naming usually is not, and unnamed parts are indistinguishable at the saw.
How the generator builds a cut plan from your list
Once the list is right, the rest is arithmetic you should not be doing by hand.
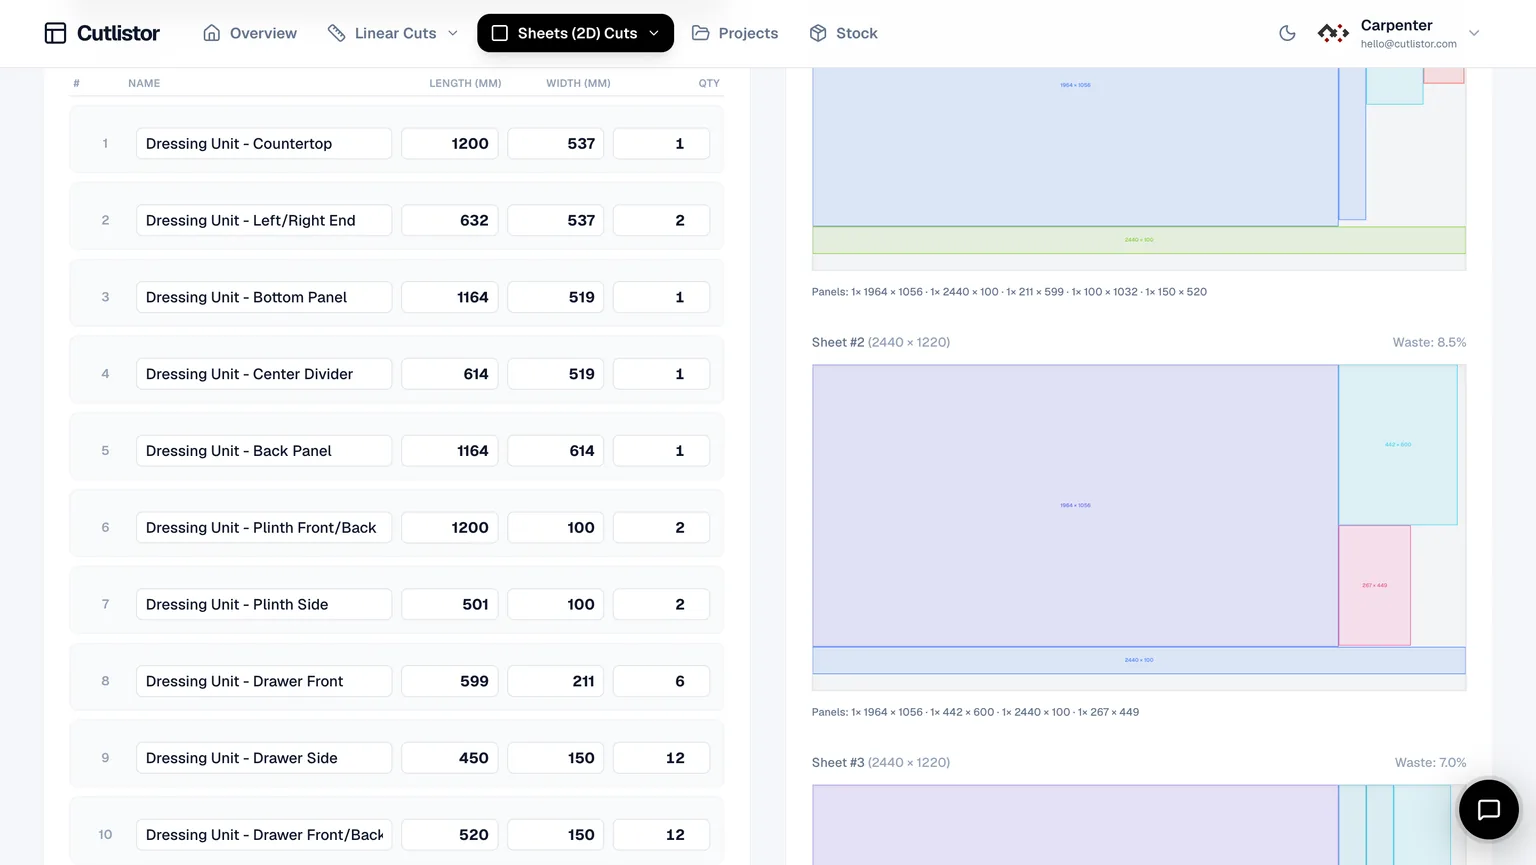
Add the stock you actually purchase - sheet sizes or stick lengths, by the SKU on the delivery note. Set kerf for the tool that will cut. Run the layout, and read the stock count before anything else: that is the number that becomes a purchase order. Then look at the diagram as the person who has to cut it, and try a second layout strategy if the sequence looks awkward.
Export the PDF when the diagram matches how your shop works. If a dimension changes afterwards, edit the row and re-run - the layout refreshes and the old PDF is the one to throw away.
Sheet parts and linear parts generate separately
A cut list generator handles two different shapes of problem, and mixing them produces nonsense. Panels are rectangles nested in two dimensions on a sheet. Lumber, trim, pipe, tube, bar and extrusion are lengths packed in one dimension onto sticks.
Most real jobs have both. Generate the panel list and run it through the sheet optimizer; generate the stick list and run it through the linear optimizer; combine the two PDFs in one job pack. The material summary that goes to purchasing lists both.
What you can export
A generated list is only useful in the formats the next person needs it in.
- PDF cut plans with nested diagrams and a parts table, for the shop floor
- CSV and XLSX parts tables, for pricing, purchasing, or an ERP import
- DXF layouts for CAM, on paid plans
- Printable labels and part lists that match the diagram numbering
Free anonymous use covers 3 PDF exports per day with unlimited editing and re-running, up to 20 part rows per session, and CSV or XLSX import up to 5 rows. Saved projects, stock inventory and DXF export need an account.
Generator, optimizer, or calculator?
The three words get used for the same software, but they describe different halves of it, and knowing which you need saves a fruitless search.
A generator produces the list of parts. An optimizer arranges those parts on stock. A calculator usually means a material-specific front end onto both - a plywood calculator and a pipe calculator are the same engine with different defaults and different worked examples.
If you already have a parts list, skip the generating and go straight to the optimizer.
| You have | You want | Start here |
|---|---|---|
| A design, no list | A parts list | Cut list generator |
| A parts list | Stock counts and diagrams | Sheet or linear optimizer |
| A spreadsheet | Both, without retyping | Import, then optimize |
| A PDF plan | Both, without reading it manually | Plan scan, then review and optimize |
FAQ
- Is the cut list generator free?
- Yes, in the browser with no account, within daily export limits. Saved projects, stock inventory and DXF export require a paid plan.
- Can I generate a cut list from a spreadsheet I already have?
- Yes. Import CSV or XLSX and the column headings get matched to the fields, so you rarely have to rearrange the file first.
- Can it generate a cut list from a drawing or 3D model?
- Yes - AI plan scanning reads PDF plans, and glTF, GLB and Collada models can be imported. Both have monthly caps that are higher on paid plans, and both outputs should be reviewed before cutting.
- Does it generate cut lists for lumber and pipe as well as sheets?
- Yes, through the linear optimizer. Panels and lengths are generated and optimized separately because they are different packing problems.
- What is the difference between a cut list generator and an optimizer?
- The generator produces the parts table; the optimizer decides where those parts sit on stock. Most tools, including this one, do both.
Related calculators
- Sheet optimizerSheet optimization for plywood, MDF, melamine, plate, aluminium, acrylic and glass: enter stock and parts, set kerf, and export a nested cut plan as PDF.
- How many pieces can you cut from a 4×8 sheet?Pieces per 4×8 sheet with and without saw kerf: a reference table, the strip calculation, and why textbook answers are usually one row optimistic.
- Cut list calculatorFree cut list calculator for sheet goods and linear stock. Enter parts, stock and kerf, get sheet or stick counts and a printable cut plan - no account needed.
- Cutting list calculatorFree cutting list calculator in millimetres. Enter parts, board sizes and kerf, get board counts and a printable plan for melamine, MDF and plywood.